The EPA regulates woodstove emissions in the US. Each year, they publish a list of the roughly 700 types of woodstoves sold in the US that includes an emissions metric (grams of particulate per hour) and a range of output power (BTU/h) for each stove.
For reasons that I may never understand, the EPA releases this data as a PDF.
Datacentric citizen that I am, I have converted the data to spreadsheet format, so you can sort it by emissions rate, if that's your kind of thing. I also removed some of the duplicate data. Some stoves were listed by two manufacturers, where one is a subsidiary of the other, but in some cases, one company or the other no longer exists. Such is the case with CFM Corporation, the bankrupt owner of Vermont Castings and Majestic Products, so I deleted those rows. (It appears that both brands, as well as several others, are now manufactured by a new parent company, Monessen Hearth Systems.)
By the way, as a quick summary of the data: if you want a clean stove, buy one from Vermont Castings. They make 6 of the 10 cleanest stoves, 5 of which emit less than 1 g/h of particulates. For comparison, fireplaces produce around 30-60 g/h.
And, for those of you using the only operating system where virus scanners are normal: Excel spreadsheet
I should also say that particulate emissions are not the only emissions to think about with a woodstove. According to the Energy Information Administration and Google's sweet unit conversion feature, wood releases around 85 g of CO2 per MJ of heat. That's better than coal, which is up around 90-100 g/MJ, but worse than natural gas, at 50 g/MJ. Electric heat is the worst, at 125 g/MJ, assuming the electricity is coming from a ~40% efficient natural gas power plant like the Exelon Power plant in Everett that supplies Somerville's peak loads.
Of course, you have to heat your house somehow (or move to the tropics). Trees will grow back soon, while coal and natural gas take a little longer.
September 02, 2009
Aerial reconnaissance of renewable energy, aided by Google and Bing
Here's a story for you, told through links to satellite imagery.
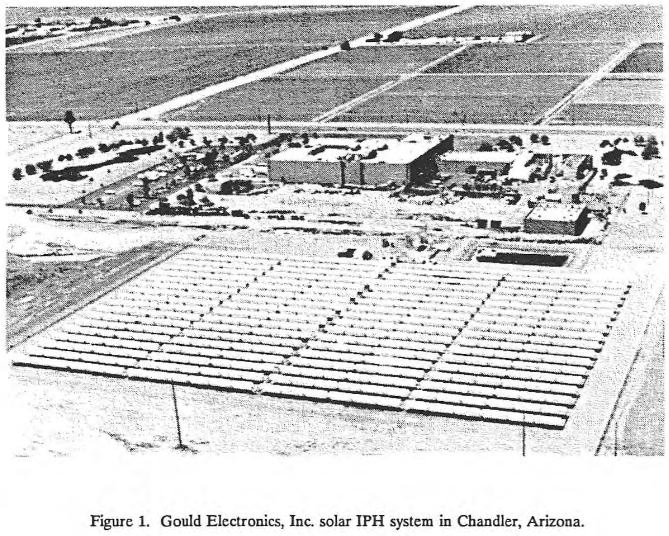
In reading about concentrating solar thermal plants this morning, I learned of a copper electroplating operation in Chandler, AZ, that used 5500 m^2 of solar trough concentrators for process heat. Searching for "copper electroplating chandler arizona" on Google Maps yielded only one address actually in Chandler: Gould Electronics' foil division at 2929 W Chandler Blvd. I see a big lot with a lot of dirt and industrial stuff, but no solar thermal array.
Switch over to Bing.com/maps for their orthographic "bird's eye" imagery, and search for "2929 W Chandler Blvd, Chandler, AZ". This shows you what I assume is the Gould Electronics building, but I still don't see any solar thermal array.
Change to the aerial view, and we have a surprise-- the building is gone! It's strange that Bing has images from two different times, but I suppose some of the images have to be older than others, and there's no point in trying to synchronize them, given how slowly buildings and roads change.
Oh well-- no copper electroplating solar thermal array for me. As a consolation prize, here are the Kramer Junction plants, SEGS III-VII, built in the 80s. (Looks like about 10 out of their ~8440 troughs are substantially misaligned-- slightly more than 0.1%. I wonder whether we're seeing mechanical failures or controller or sensor errors. (And, no, I didn't count all the troughs. I used multiplication.))
Skunk war dispatch the third, in which the skunk's treachery is revealed
The wire mesh we installed at the outset of the Great Skunk War of 2009 has proven impermeable to skunkenkind long enough that I decided to take the next step. The main reason that we didn't want skunks under our front porch was that the crawlspace under the porch extends under the bathroom off the kitchen. This leaves the pipes under the bathroom exposed to freezing temperatures in the winter, which is no good. I planned to install some sort of insulating barrier between space under the bathroom and the rest of the porch crawlspace, but I didn't want any offers of assistance or whatnot from any skunk who happened to be dwelling in the crawlspace at the time.
I figured that if we blocked off the crawlspace with wire mesh, either the skunk wouldn't be able to get in, or he wouldn't be able to get out. After a few months of no skunk traffic, it would be safe to enter the crawlspace. "At least if I have to fight the skunk," I thought, "he'll be dead, which should give me enough of an edge to secure victory."
I started by making a pair of plunge cuts with a jigsaw in the porch floor. After some vigorous prying, I got the boards up. Fortunately, no skunks, dead or otherwise, leapt up to assail me when I removed the boards.
I was surprised to see that the insulating wall that I was planning on building at the end of the porch had already been constructed. However, closer inspection showed that Merle, or one of his skunken brethren, had burrowed under the wall at one end, allowing cold air into the space under the bathroom. This is where the extent of Merle's treachery became apparent. All the hours I had spent last winter pouring hot water down the drain, stuffing insulation into cracks, and aiming Sharon's hair dryer into the gaps behind the shower plumbing were lost to a problem caused by this worthy adversary.
But overall, this is a pretty desirable outcome. I can plug the hole easily enough, and adding insulation to a wall is a lot easier than building the wall in the first place. (This isn't actually true for most walls, but under a porch, where appearance is of no importance, you can just pile on layers.)
I framed in the opening with 2 x 4's and strapped the planks together with some plywood scraps.
Despite my best efforts to reassemble the planks into a panel of the same length as the hole they came out of, the hatch stood about an eighth of an inch proud when I was done. A few minutes with a block plane solved that.
It's at this point I have to admit that I haven't really finished the job. I made up the panel as the sun was going down, and that was mostly motivated by the horror of what would happen if I left the hole exposed at night-- some skunk liberation front would probably invade, pack the place with stinkbombs triggered by cellphones, or something like that.
In any case, the northwestern front is still secure, but the insulation will have to wait for another day.
August 23, 2009
Building a 150 foot zipline
My brother and his wife bought a house in Michigan a few months ago, and Sharon and I went out to visit them last weekend. The house is on a wooded lot a few miles outside of town. There are other houses that you can make out through the woods, but nobody really nearby. They probably own an acre or two of woods, and they abut a 15 acre park (which previously housed a privately-owned 1/3 scale steam railroad-- I'll save that for a later post).
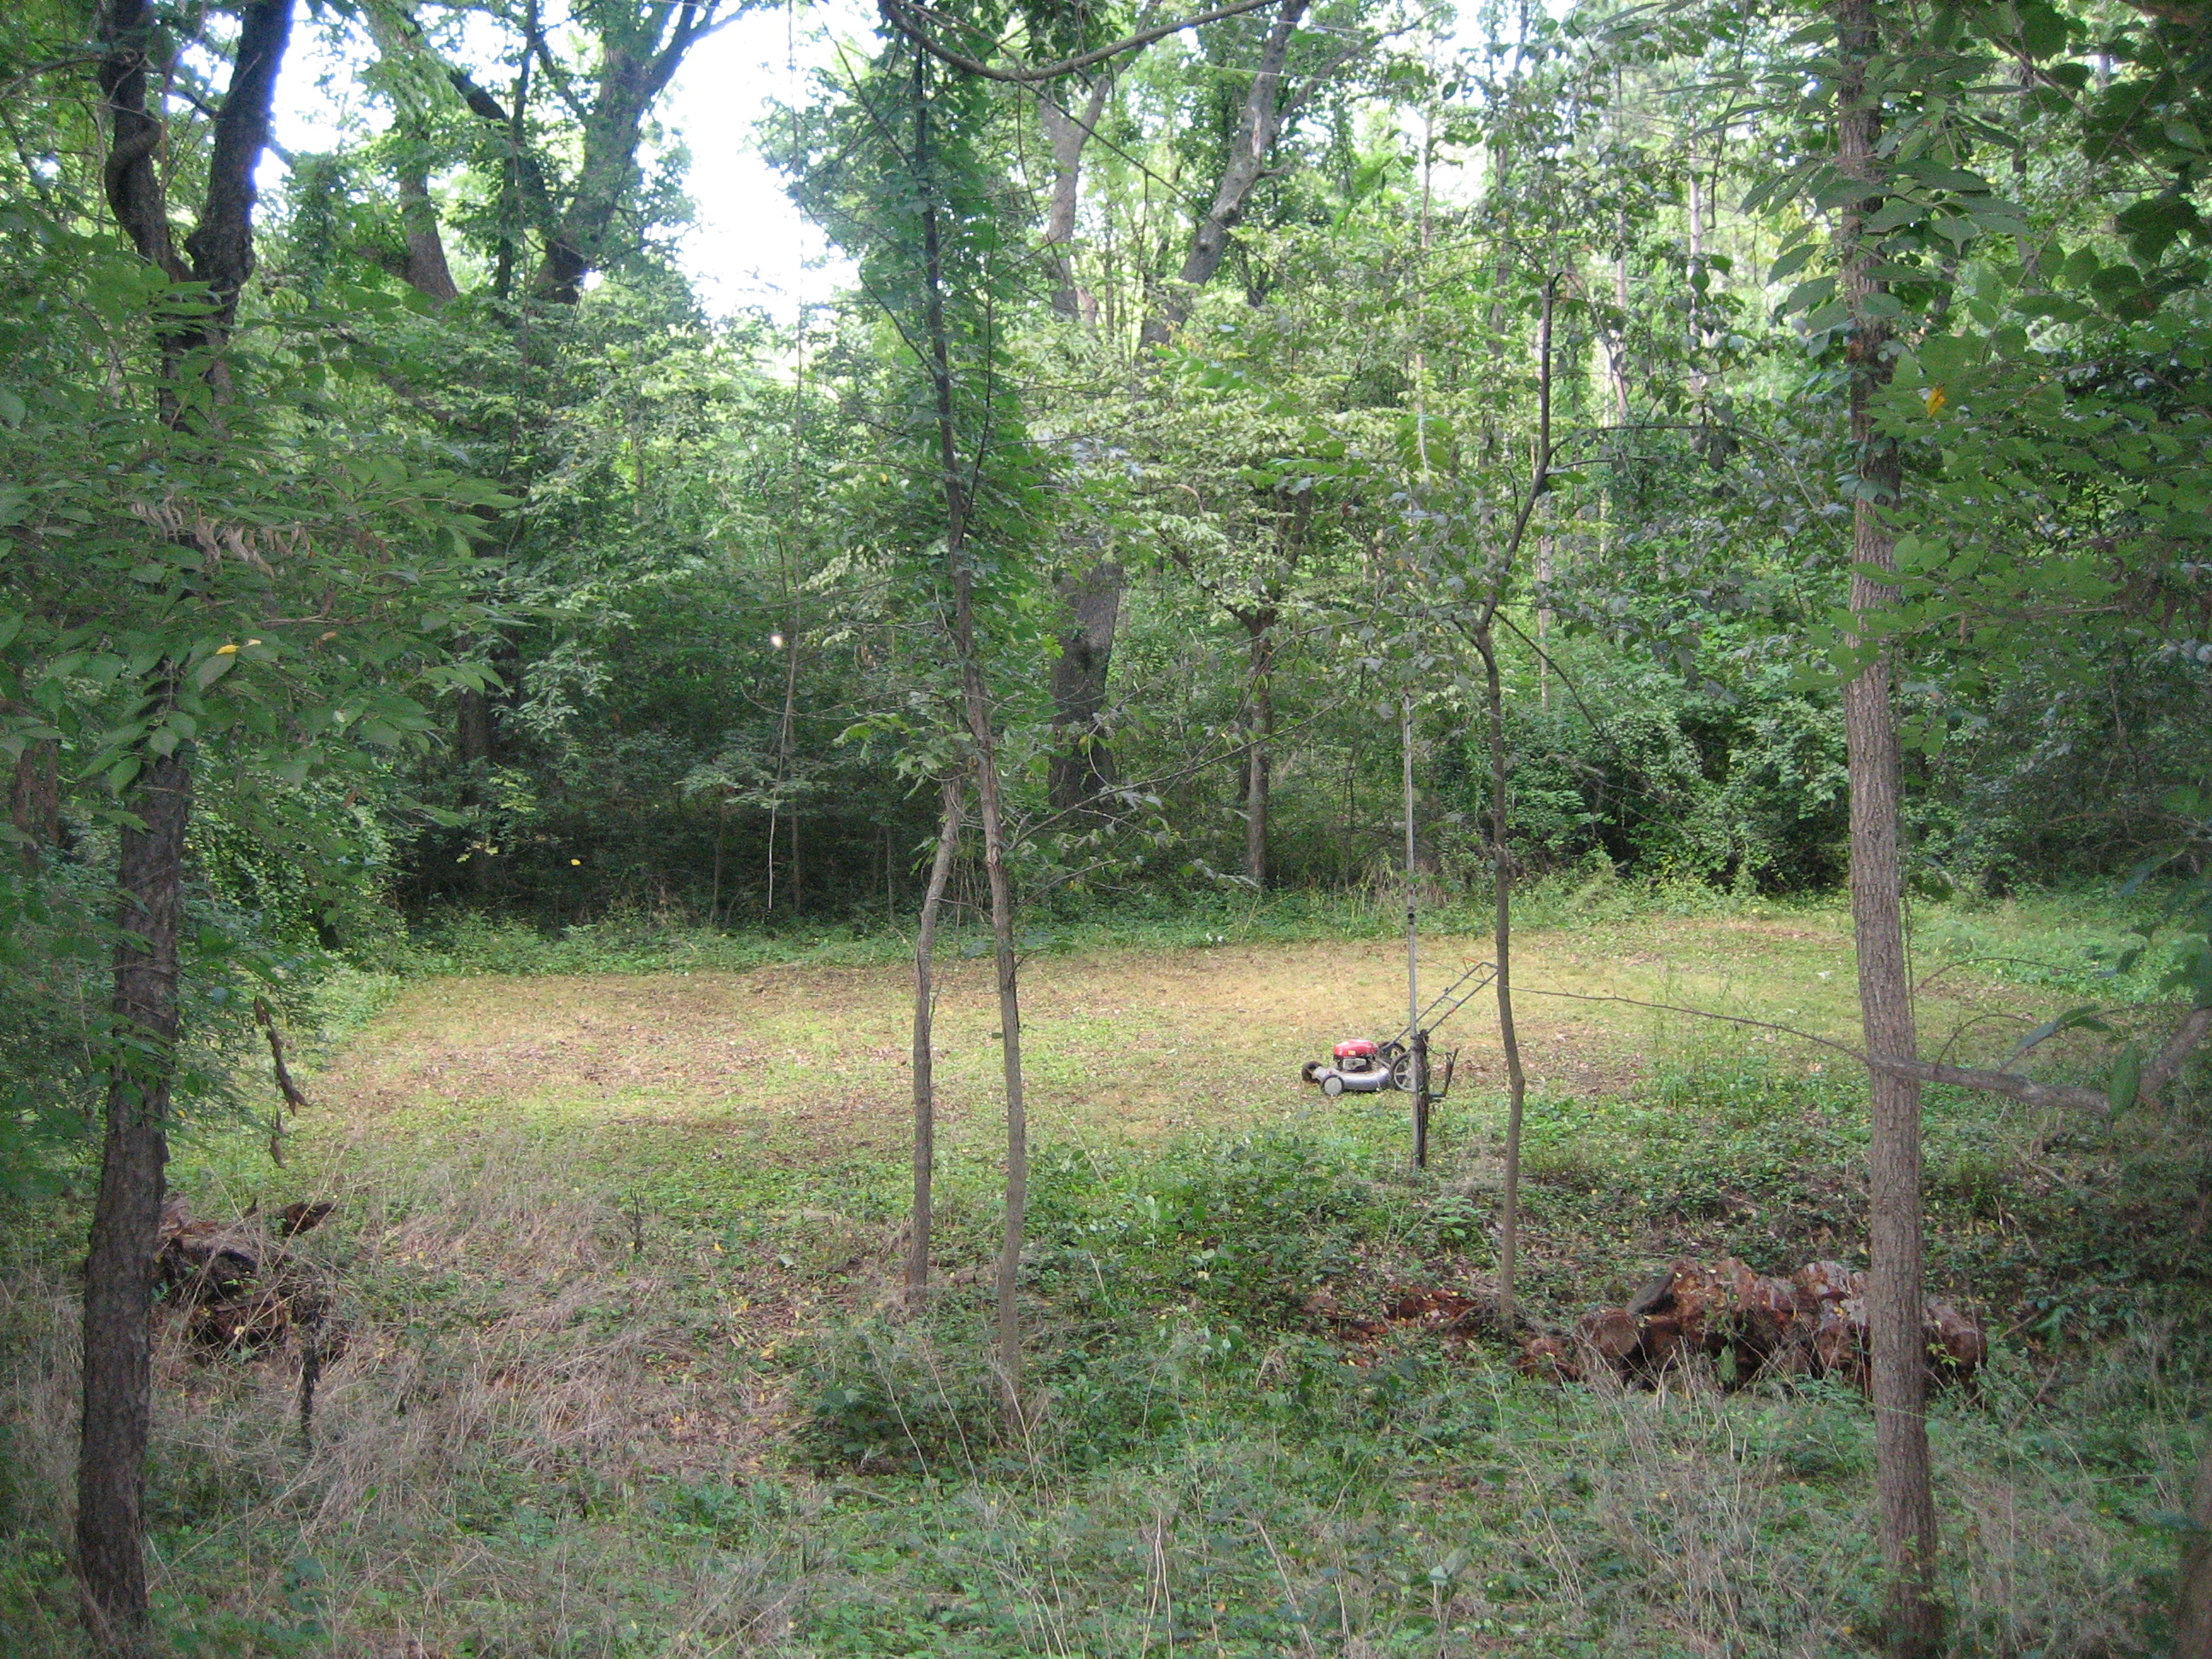
At some point, we were standing around in the yard when Ben pointed out an overgrown field about 30 yards through the woods. Ben had previously discovered steel posts that suggest the field was in fact a grass tennis court that hadn't been maintained for at least a decade. As soon as I saw the outline of the tennis court, I thought, "These weeds will be subdued by this man. I will burn fossil fuels in an age-old ritual: the subjugation of the wild to man's will."
A few days later, I dragged Ben's 6.5 horsepower beast of a lawnmower out of the shed and fired it up. 30 minutes later, nothing taller than three inches lived within the perimeter of the court.
The tennis court, recovered
Once the tennis court was recovered, the landscape was changed. Instead of a house in the woods, we had in our possession a house overlooking a small athletic field. There was talk of a croquet pitch or maybe a small soccer or frisbee game. I mowed the rest of the field, and we thought about the possibilities.
Later in the day, we talked about maybe putting a zipline in the yard on the other side of the house, but it didn't really seem like the right spot. The lawn was something of a valley; I didn't see an easy way to position the zipline so the rider wouldn't crash into the tree at the bottom. As it was getting dark, I walked around the yard and considered the possibilities. Coming around the corner to the tennis court, I noticed that the court was a good ten feet lower than the house, and there was a nice tree right at the edge of the yard. Ben pointed out that there was a massive tree on the far side of the tennis court. I paced the distance off at around 150 feet.
As I was lying in bed that night, I did some calculations in my head. The potential energy of a person at the top of the hill would be converted into kinetic energy at the bottom of the hill. If we ignore wind resistance and friction in the pulleys, we can estimate an upper limit of the speed.
The m cancels out, so either we all die, or nobody does. When you reach the bottom, the maximum possible speed is
h is around 10 feet, and g is 32 ft/s^2. This means that roughly
I went to sleep thinking that a zipline where you landed at a 25 ft/s sprint was about as dangerous as I wanted.
The zipline site, looking up the hill
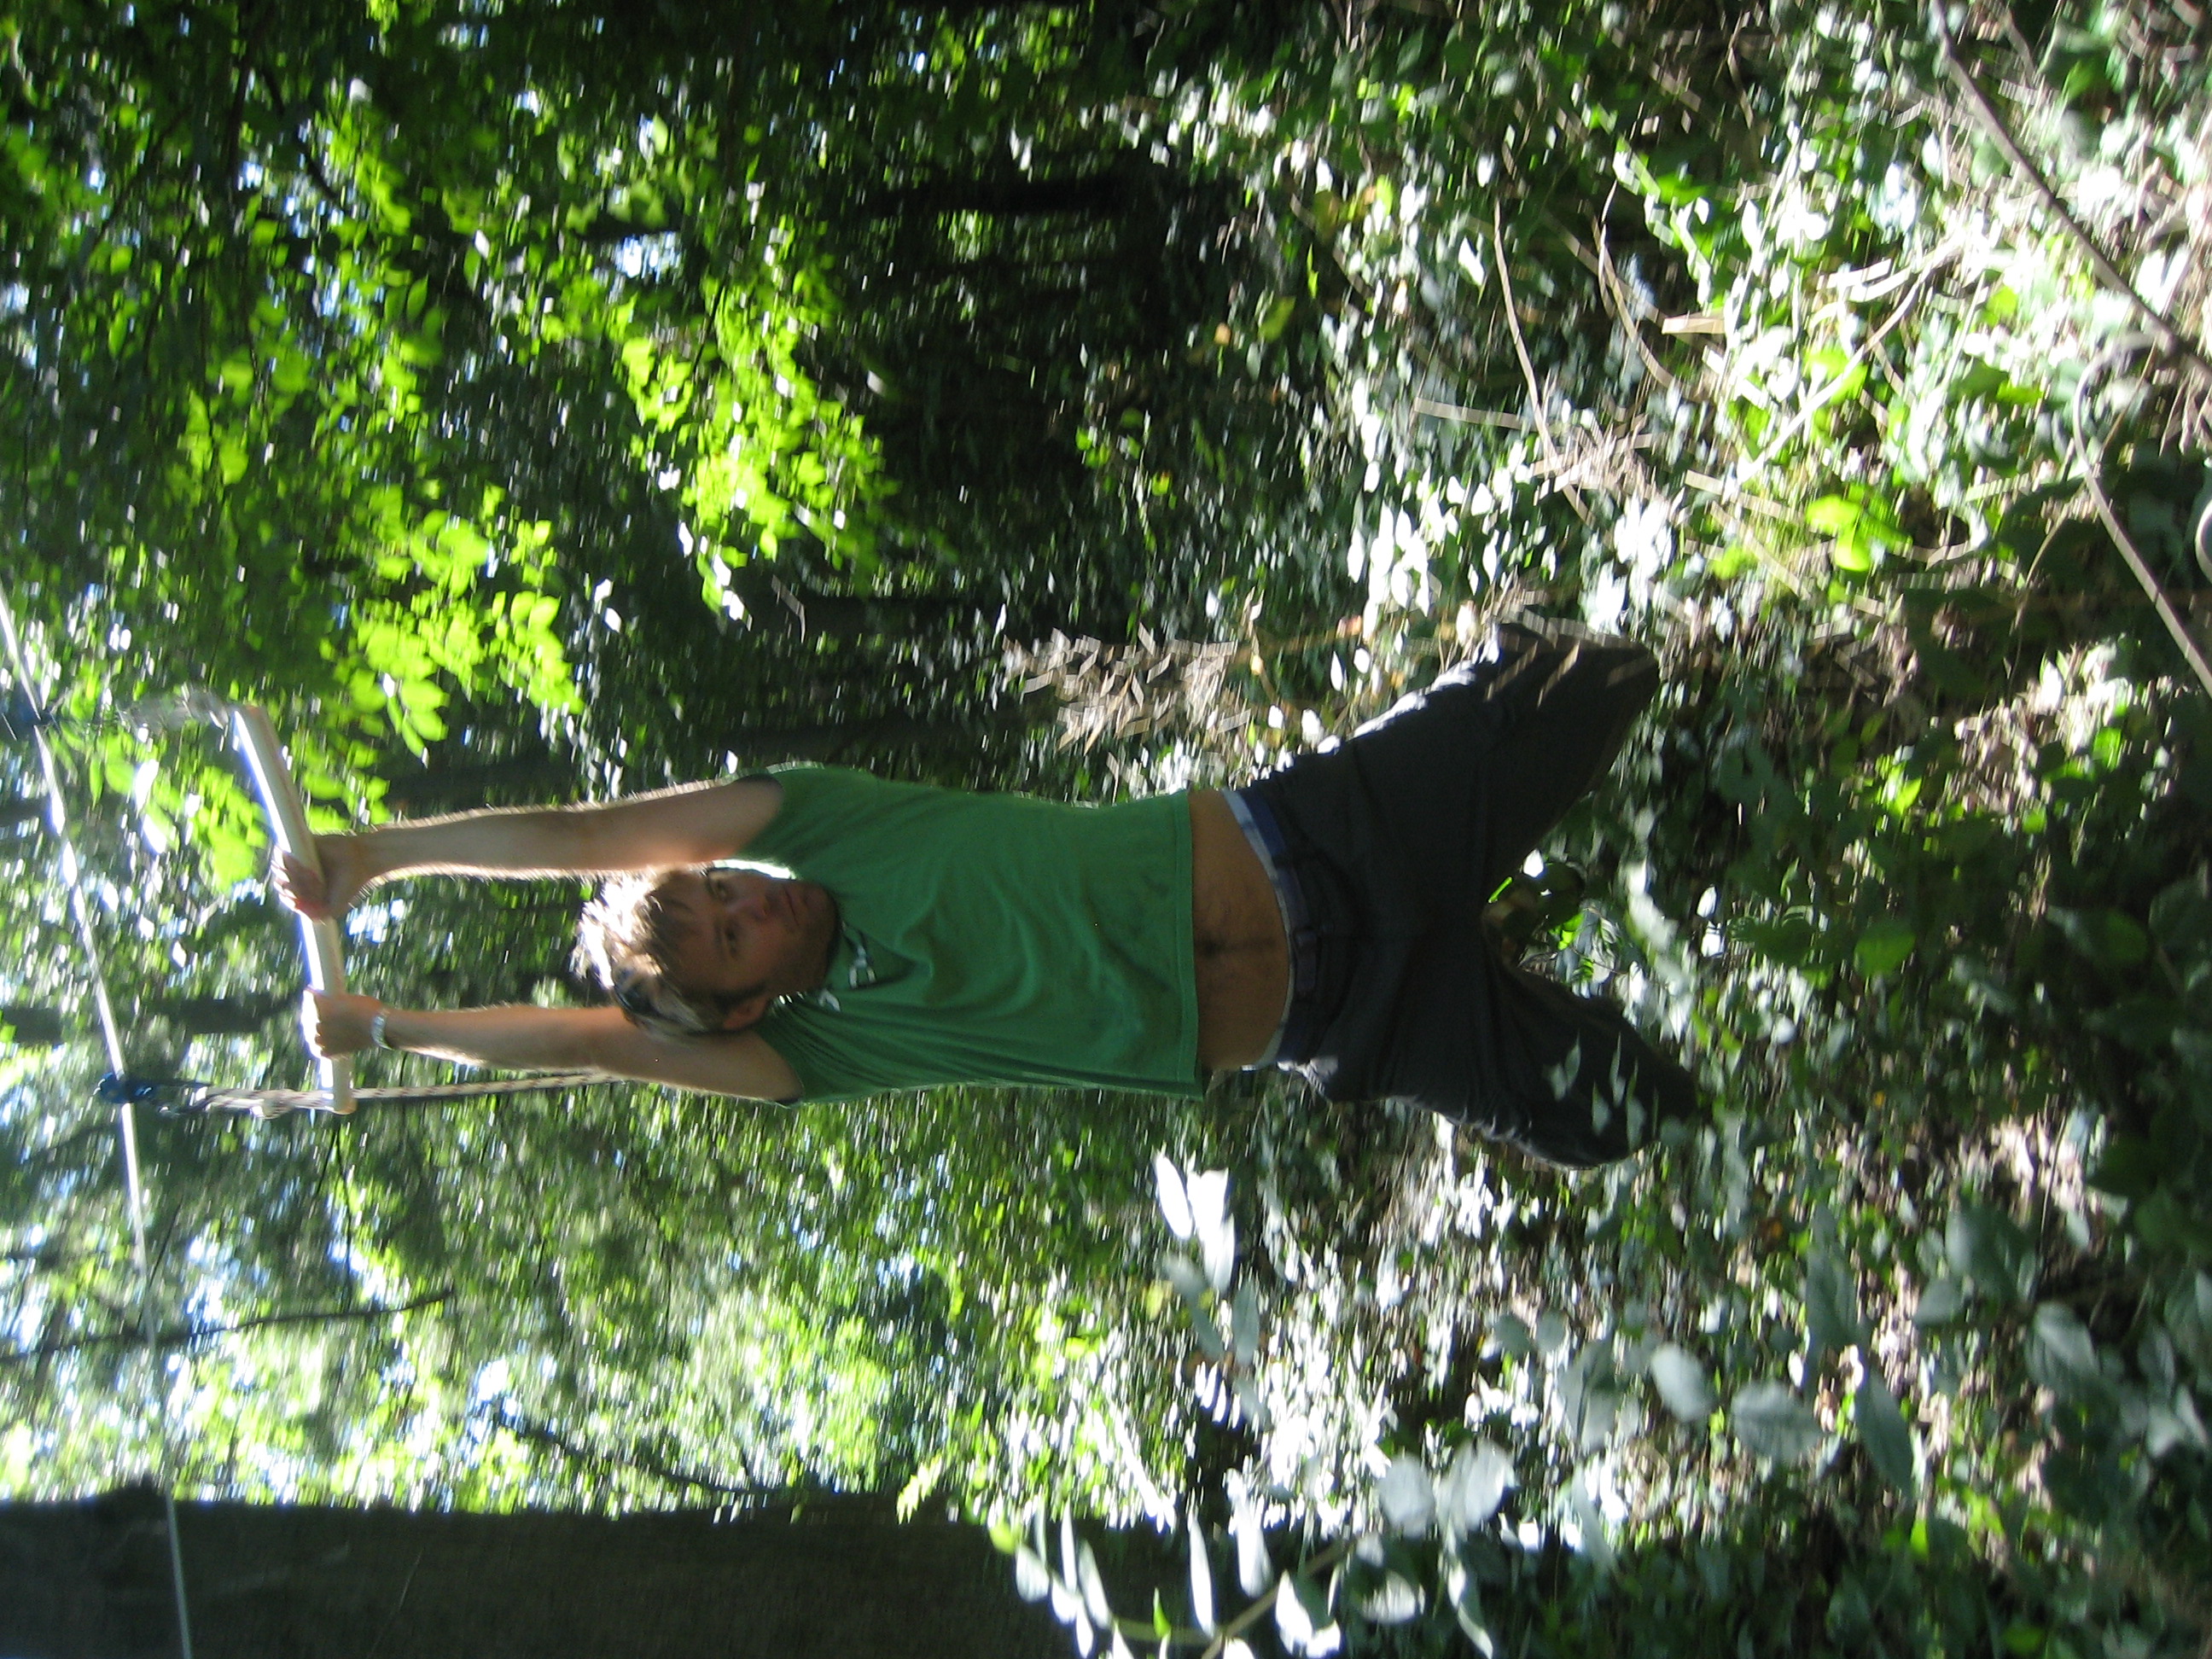
The next day, we went to Home Depot and picked up 200 feet of 7x19 1/4" steel cable, a 24" piece of schedule 40, 1" PVC pipe, and some cable clamps. A little internet research suggested that REI might have some cheap pulleys that could bear the load. They didn't have exactly the pulleys we were hoping for, but we found some that were good enough. We also got two carabiners. The advertised breaking strength of everything involved was at least 2000 lbs, more than 10x the weight of the heaviest rider. (I was expecting the cable to be slightly slack, so I wasn't worried about the 1/sin force amplifying effect if the cable were taut.)
The supplies
In the afternoon, we laid out the cable. We didn't have any good way of tightening the cable other than Ben pulling on it as hard as he could while I clamped down the fittings real quick-like, but the terrain was such that a slightly slack line worked great. You skim about 2 feet off the ground most of the way, before running to a stop as you intersect the flat tennis court. (The videos below suggest an alternative "crash-and-burn" method of landing, but we were going for distance then. It's relatively easy to land on your feet if you do it when the cable is at shoulder height. Cable at thigh height-- not so much.)
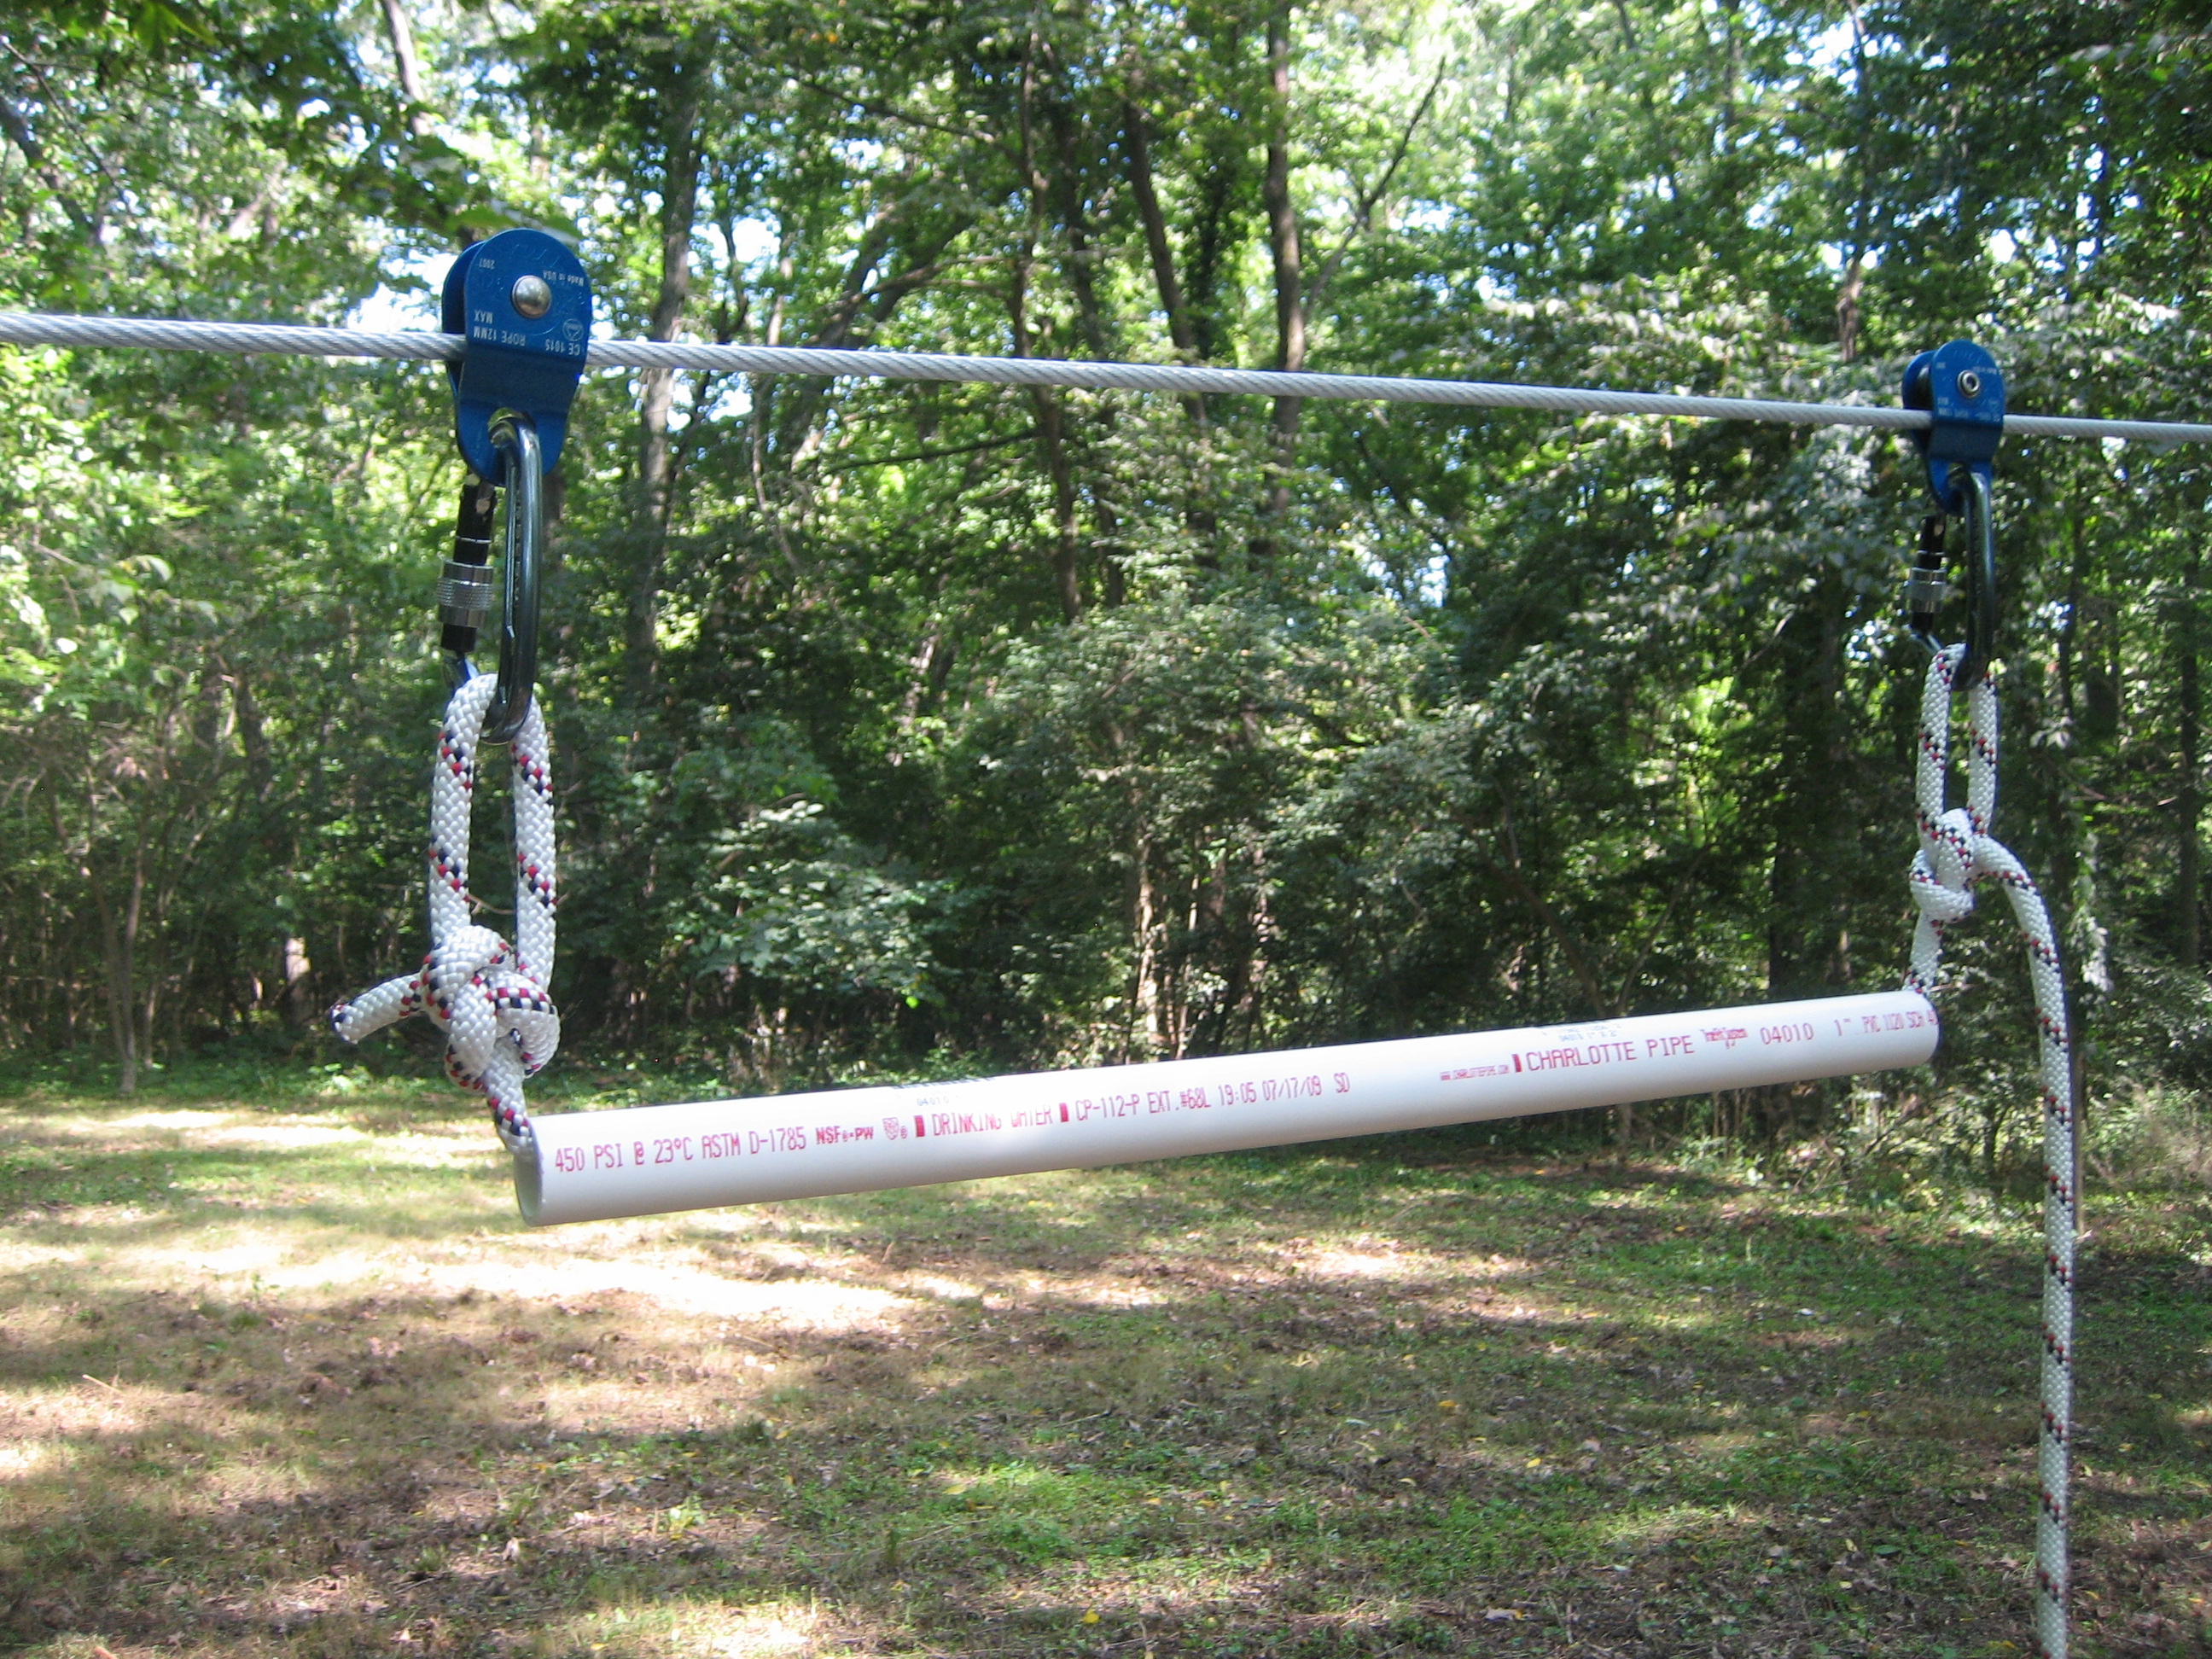
The trolley
The pipe-trolley forcing alignment with the cable worked well; I think a trapeze mounted at a single point would make it harder to launch and land safely. After a few runs, I noticed that the axles in the pulleys were too hot to touch, due to the friction from the nylon sheaves. That was mitigated with a few squirts of Boeshield T-9, everyone's favorite waxy lubricant. In the future, if the zipline proves popular, we might raise the start a foot or two and switch to a Petzl "Tandem Speed" pulley, which has ball bearings instead of a nylon sheave riding on a fixed axle. There's also talk of adding a slip-n-slide in the landing zone.
I knew that the zipline was a success when my brother's wife went out and rode it three times in a row by herself the next morning.


 The tennis court, recovered
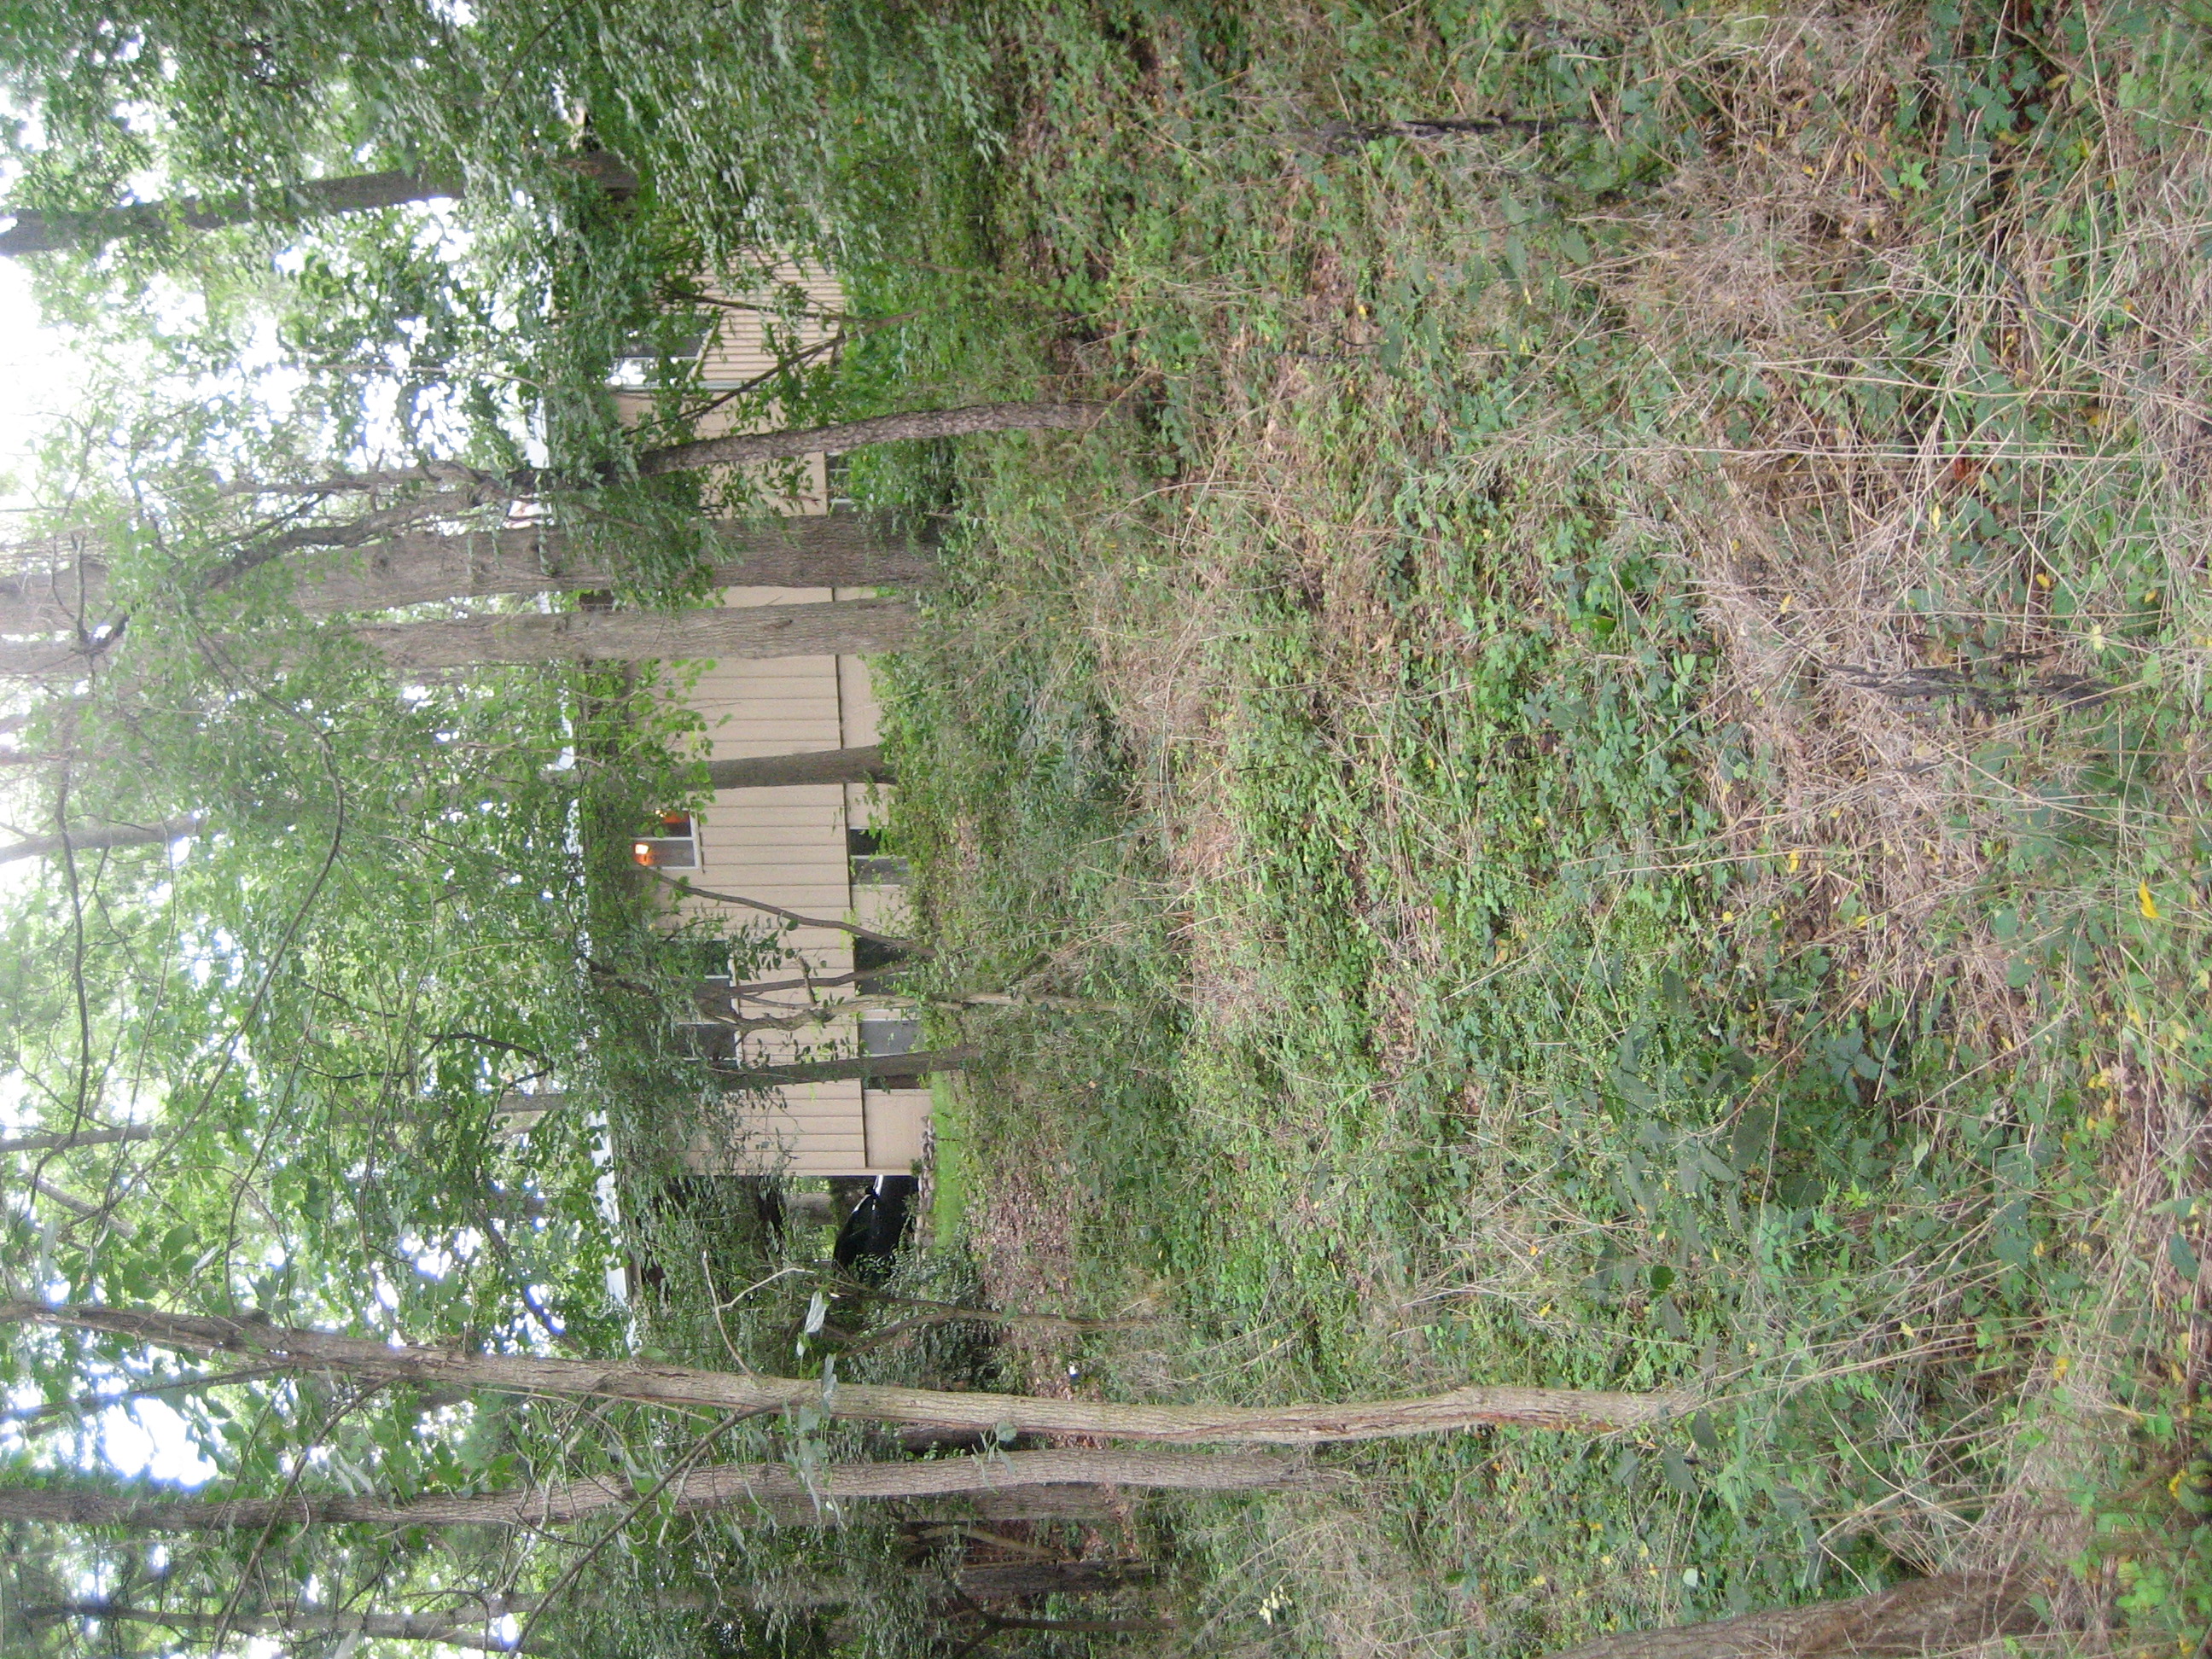 The zipline site, looking up the hill
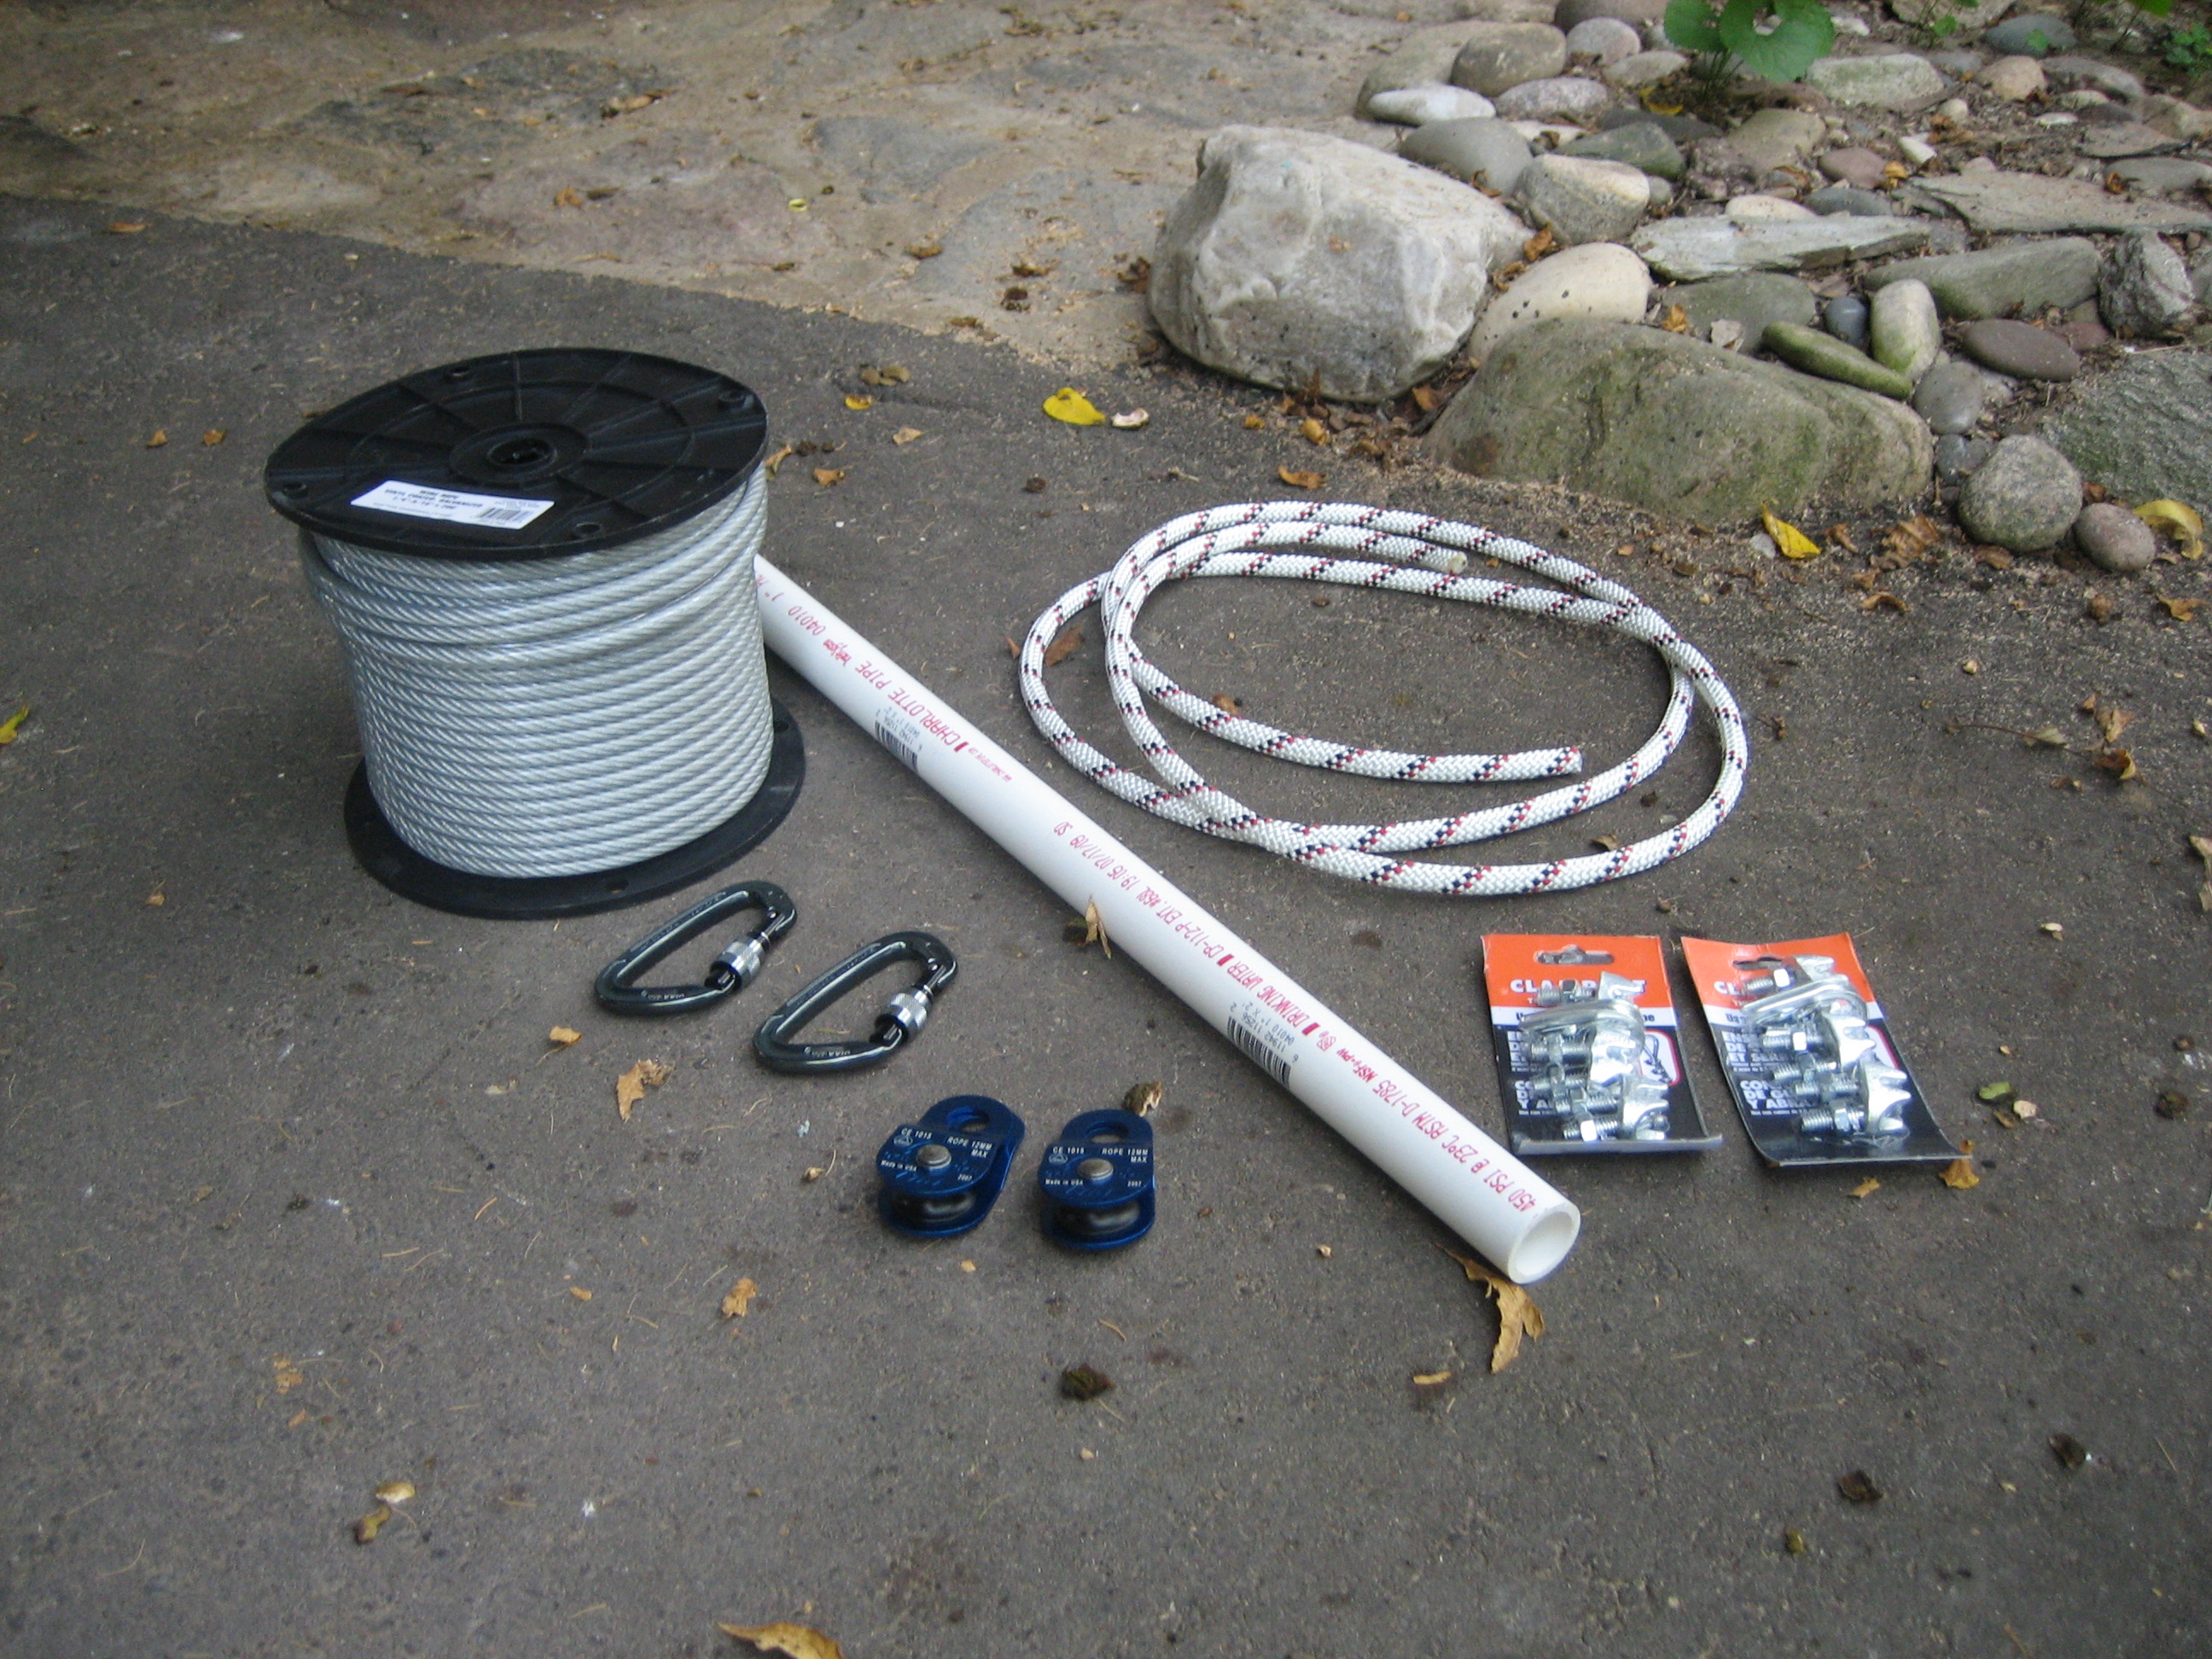
 The trolley
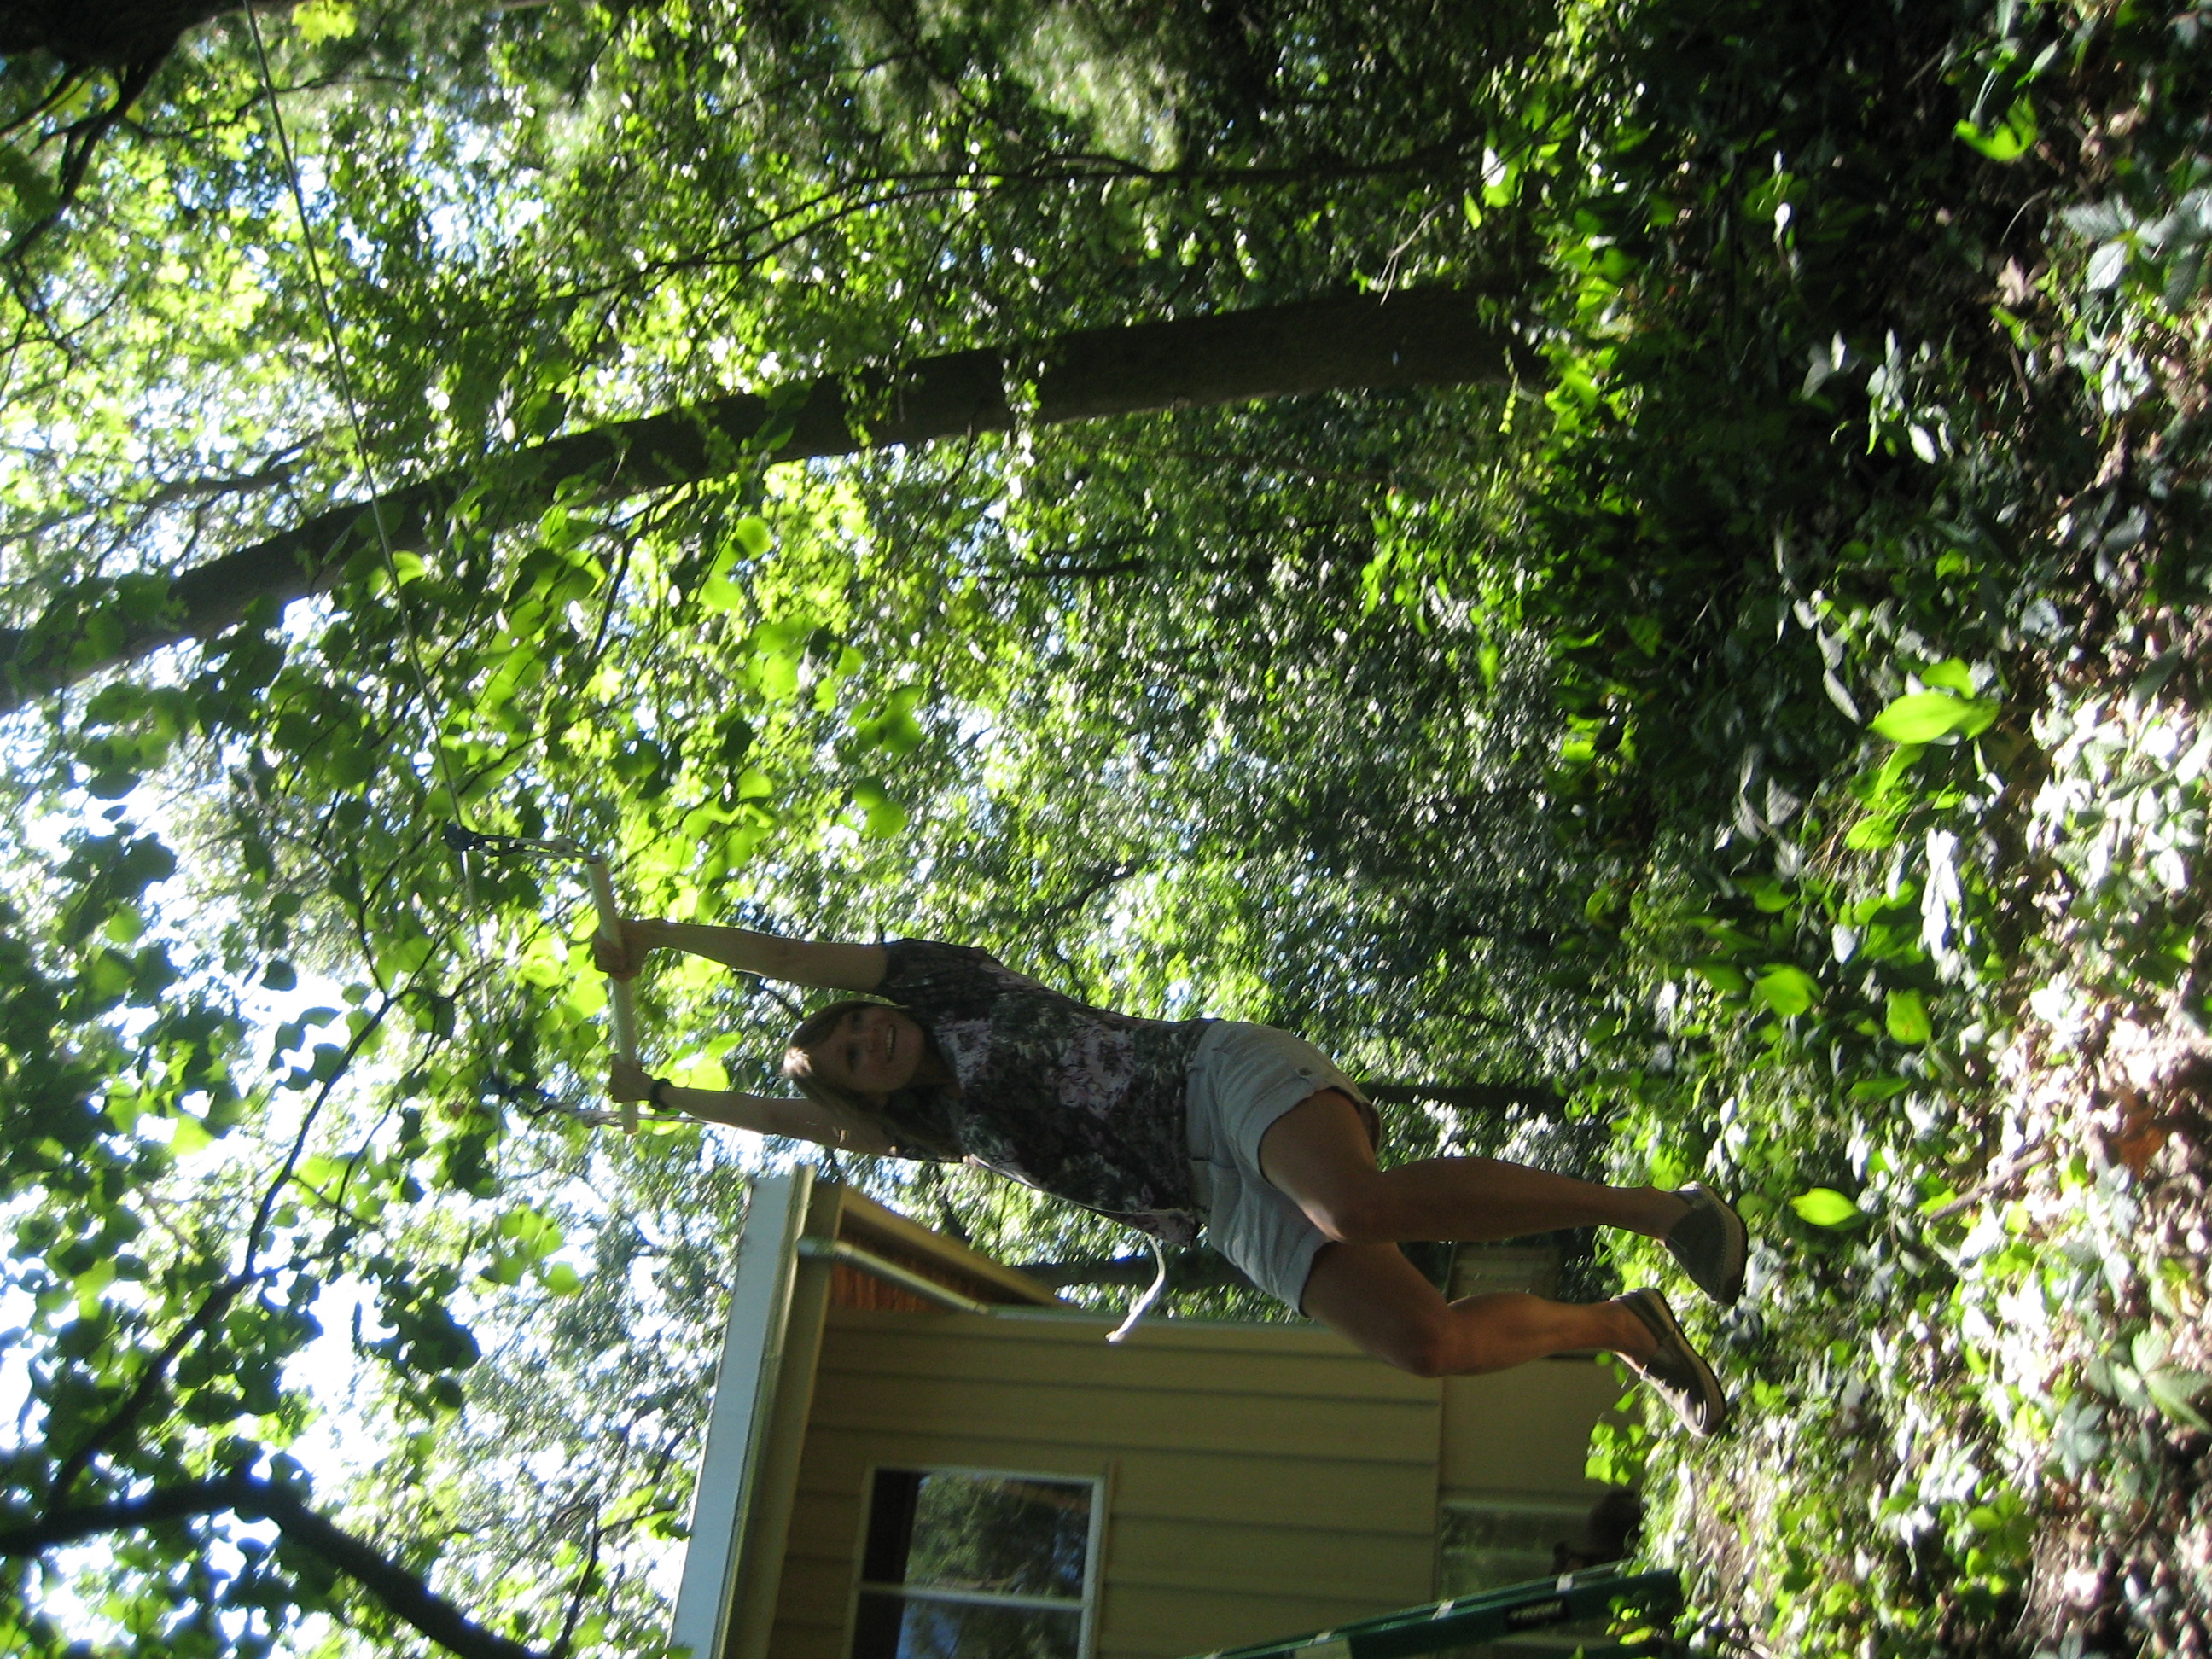