
March 21, 2013
Bringing an analog voltage Arduino shield to life
One of the Rascal accessories I've been working on for scientists is what I call the Precision Voltage Shield. It's a circuitboard that plugs into the Rascal or an Arduino that allows you to measure 8 voltages very precisely. Yesterday, I got the precision voltage shield working as an 8-channel digital multimeter with an Arduino. I wanted to record some of the details of how I got working for posterity.
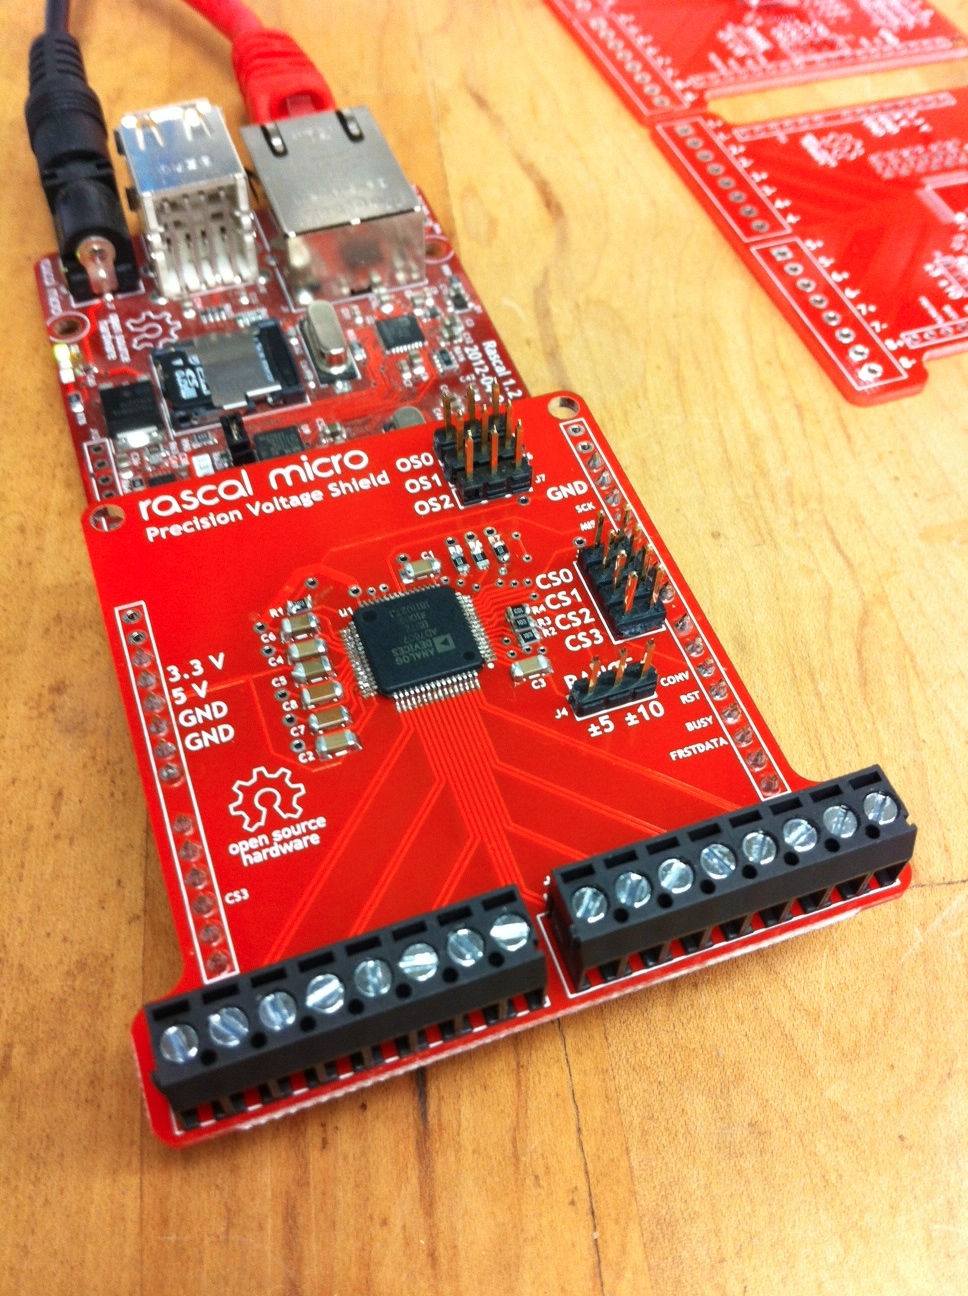
Here's what the precision voltage shield looks like plugged into a Rascal. What a handsome devil!
An overview of how the AD7607 A/D converter works
The core of the precision voltage shield is the Analog Devices AD7607 analog-to-digital converter. This chip measures 8 channels with 14 bits of resolution. There are also 16-bit and 18-bit versions, but they cost a little more. I'll probably offer variants of the shield that use those chips if people are interested.
The AD7607 has some awesome features that make it better than a classic A/D converter like the ADC0805. The first is the input filtering it includes. When you sample a voltage repeatedly over time, you run into the problem of aliasing, where high-frequency noise exceeds twice your sampling frequency, which makes it appear like low-frequency noise. Once you've sampled it, you can't tell whether it was high-frequency noise aliased down, or real low-frequency noise, so no digital filter can help you.
The fix for aliasing is an analog filter on each input. Older A/D chips didn't have this because we didn't know how to make capacitors inside chips cheaply. Analog Devices has apparently figured this out; their datasheet claims that each channel has an analog second-order Butterworth filter that attenuates noise over 15 kHz or so. (The 3 dB point changes slightly depending on the input range selected.)
The second cool feature is adjustable oversampling. In its default configuration, when you ask the precision voltage shield for a reading, it samples 64 times and gives you back the average reading. If you want, you can cut the traces under the OS0, OS1, and OS2 jumpers to configure the sampling rate to be higher, but there's no sense in doing that unless you can actually store data at significantly higher data rates than 1 kHz. (See the notes about speed further down for some more thoughts on this.)
The third excellent feature is the adjustable input range. With a jumper on the shield, you can choose whether the input range is +/-5 V or +/-10 V. This means that you can handle large voltages while still being able to read smaller voltages accurately if you need to.
How measurements actually work
To make the shield take a measurement, you pulse pin 5, which is labeled "CONV." The shield will answer by raising its "BUSY" line for around 300 microseconds. After this, the Rascal or Arduino can read the data out using the SPI protocol on "MISO" (pin 12). The oscilloscope screenshot below shows two full cycles of voltages being read. The gap between conversions (around 1 millisecond) is the time it takes for the Arduino to send the raw data to my laptop over USB at 115200 bps. With this gap, the system cycles at 735 Hz. The precision voltage shield Arduino code that I wrote for testing is up on Github. (You are welcome to use it however you like, but I would appreciate a link back to rascalmicro.com.)
- BLUE: start conversion pulse
- PURPLE: busy during conversion
- YELLOW: digital data coming out via SPI
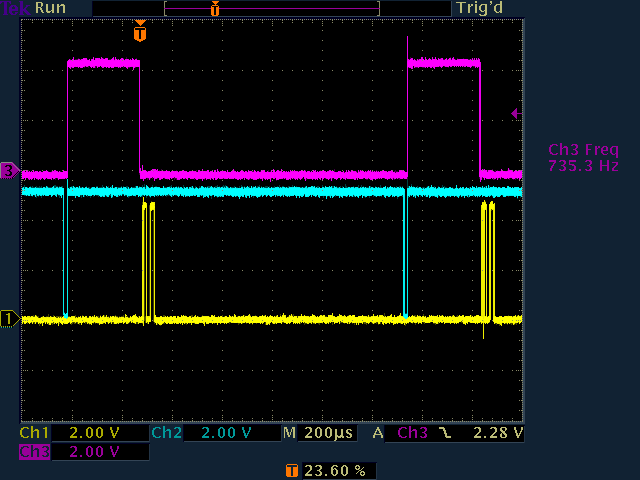
The precision voltage shield talking to an Arduino, captured on my trusty oscilloscope.
The AD7607 data format
The AD7607 spews out eight 14-bit measurements sequentially, each ranging from -8192 to 8192 to represent either -5 to 5 V or -10 to +10 V, depending on how the range jumper on the shield is set. The readings are encoded as the two's-complement of the count.
Sampling speed
By default, the precision voltage shield oversamples by 64x and averages the values. As mentioned earlier, you can speed this up if you want, but you need a way to store the data.
The Arduino Uno I was using to talk to the shield has 32 kB of flash memory. If the Arduino pulls 8 readings at around 1 kHz and stores each reading in 2 bytes, that's 16,000 bytes per second, which means that the Arduino is full in 2 seconds. Some scientists do experiments that last less than two seconds, but many (most?) last much longer, which means we need a way to get data out of the Arduino.
I tried two different methods of sending the data: raw and formatting the 14-bit fields into ASCII characters separated by commas. The formatting makes the sampling around 3 times slower (200 Hz or so, rather than 735 Hz), but the limiting factor there was the Arduino's serial transmission rate. By default, the Arduino's serial library can only transmit at 115200 bps. From what I've read on the Arduino forums, an adjustment to the UART divider can get you up to 1 Mbps serial transmission, which should take the raw data transmission time from 1 ms to around 100 us. Adjusting oversampling to just 4x should get the conversion time down to 20 us, which means you're getting averaged samples every 200 us or so, which is equivalent to 5 kHz. To go faster than that, you could reduce oversampling further, speed up SPI (risking data corruption), and switch to a parallel data transmission scheme to get data out of the Arduino faster. In the right circumstances, the AD7607 can sample at 200 ksps, but actually achieving that would take some work.
The other obvious possibility is using something more powerful than the Arduino, like the Rascal. The Rascal's processor is 25 times faster than the Arduino Uno's, and it has an SD card for storage, so the delay incurred by sending the data out the serial port is avoided. When data does need to be transmitted, it has a 100 Mbps Ethernet port.
Next up: the precision voltage shield with a Rascal . . .
March 15, 2013
The storyhouse, an interactive dollhouse for telling stories
There's a Rascal customer (let's call him "Justin") in Arlington, MA, USA, who has been building his young daughter a dollhouse over the last year or so. At some point, Justin decided that he would like to add lights to the dollhouse and control them from his iPad. The Rascal is the perfect tool for the job. He was able to wire the Rascal to a series of MinM smart LEDs and control them immediately with the BlinkM demo on the Rascal. Dealing with wiring the dollhouse with copper tape under the wallpaper has proved challenging, but in any case, it got me thinking about dollhouses.
What are dollhouses for?
People build and play with dollhouses for different reasons. For some, designing and building the dollhouse is the fun part. Some kids don't care about building at all; they just use them as the setting for tea parties or other kinds of imaginative play. "Dollhouses are for burning," says my friend Dan Beyer.
When I was a kid, I had an electric train set. I spent a lot of time flipping through Model Railroader magazine and wishing I had the resources, patience, and skills to build miniature railroad trestles. But most of the time I spent with the train set was actually spent telling stories. I would set up little scenes, usually involving a train, some small men, a helicopter, and a Batmobile (mostly hostage scenarios). Then, I would tell myself a story about how someone had been kidnapped in a helicopter, and now Batman was going to apprehend the villains. The stories never got very far, in part because the helipad wasn't accessible from the roads in the trainset, and the ground clearance on the Batmobile of the 70's didn't allow for offroading. But also, I didn't care about the outcome of the stories; I cared about setting up an exciting scene from them. This is the idea behind the storyhouse: it's a dollhouse with a Rascal embedded in it that kids and parents can use to tell stories.
The storyhouse
With a storyhouse, you sit in a dark room with your kid and tell stories together. On the first level, the iPad lets you control the lights in the house. If you want to get more advanced, you can write stories in the Rascal editor and save them on the Rascal. Like a pop-up book that has a different moving feature on each page, each page of your story can have a different button or knob that controls something in the storyhouse. I'm not sure of the details of how it will work, but the idea is that the storyhouse is a miniature stage for a play that you are directing with your kid.
The dark room gives you a mood of intimacy, where the rest of the world fades away. I spent a few summers as a camp counselor, and I can attest first hand that that if you gather a bunch of kids in a circle and put a candle in the middle, they suddenly drop the fronts they wear all day. Two kids who were telling each other to shut up, no you shut up, all day start listening to each other and talking thoughtfully. I'm hoping that the storyhouse will have the same effect.
The first prototype
The pictures below show the first version of the storyhouse, which is really more of a proof of concept than an actual prototype. Inspired by Justin's dollhouse, I quickly assembled it in the Artisan's Asylum woodshop to see if the idea was worth pursuing. The next prototype will probably have 3 floors, more windows, and more lights, but this was enough to get started. It turns out that the lighting isn't really much fun unless the room is dark. Also, the storyhouse needs internal walls so that the lights have something to bounce off.
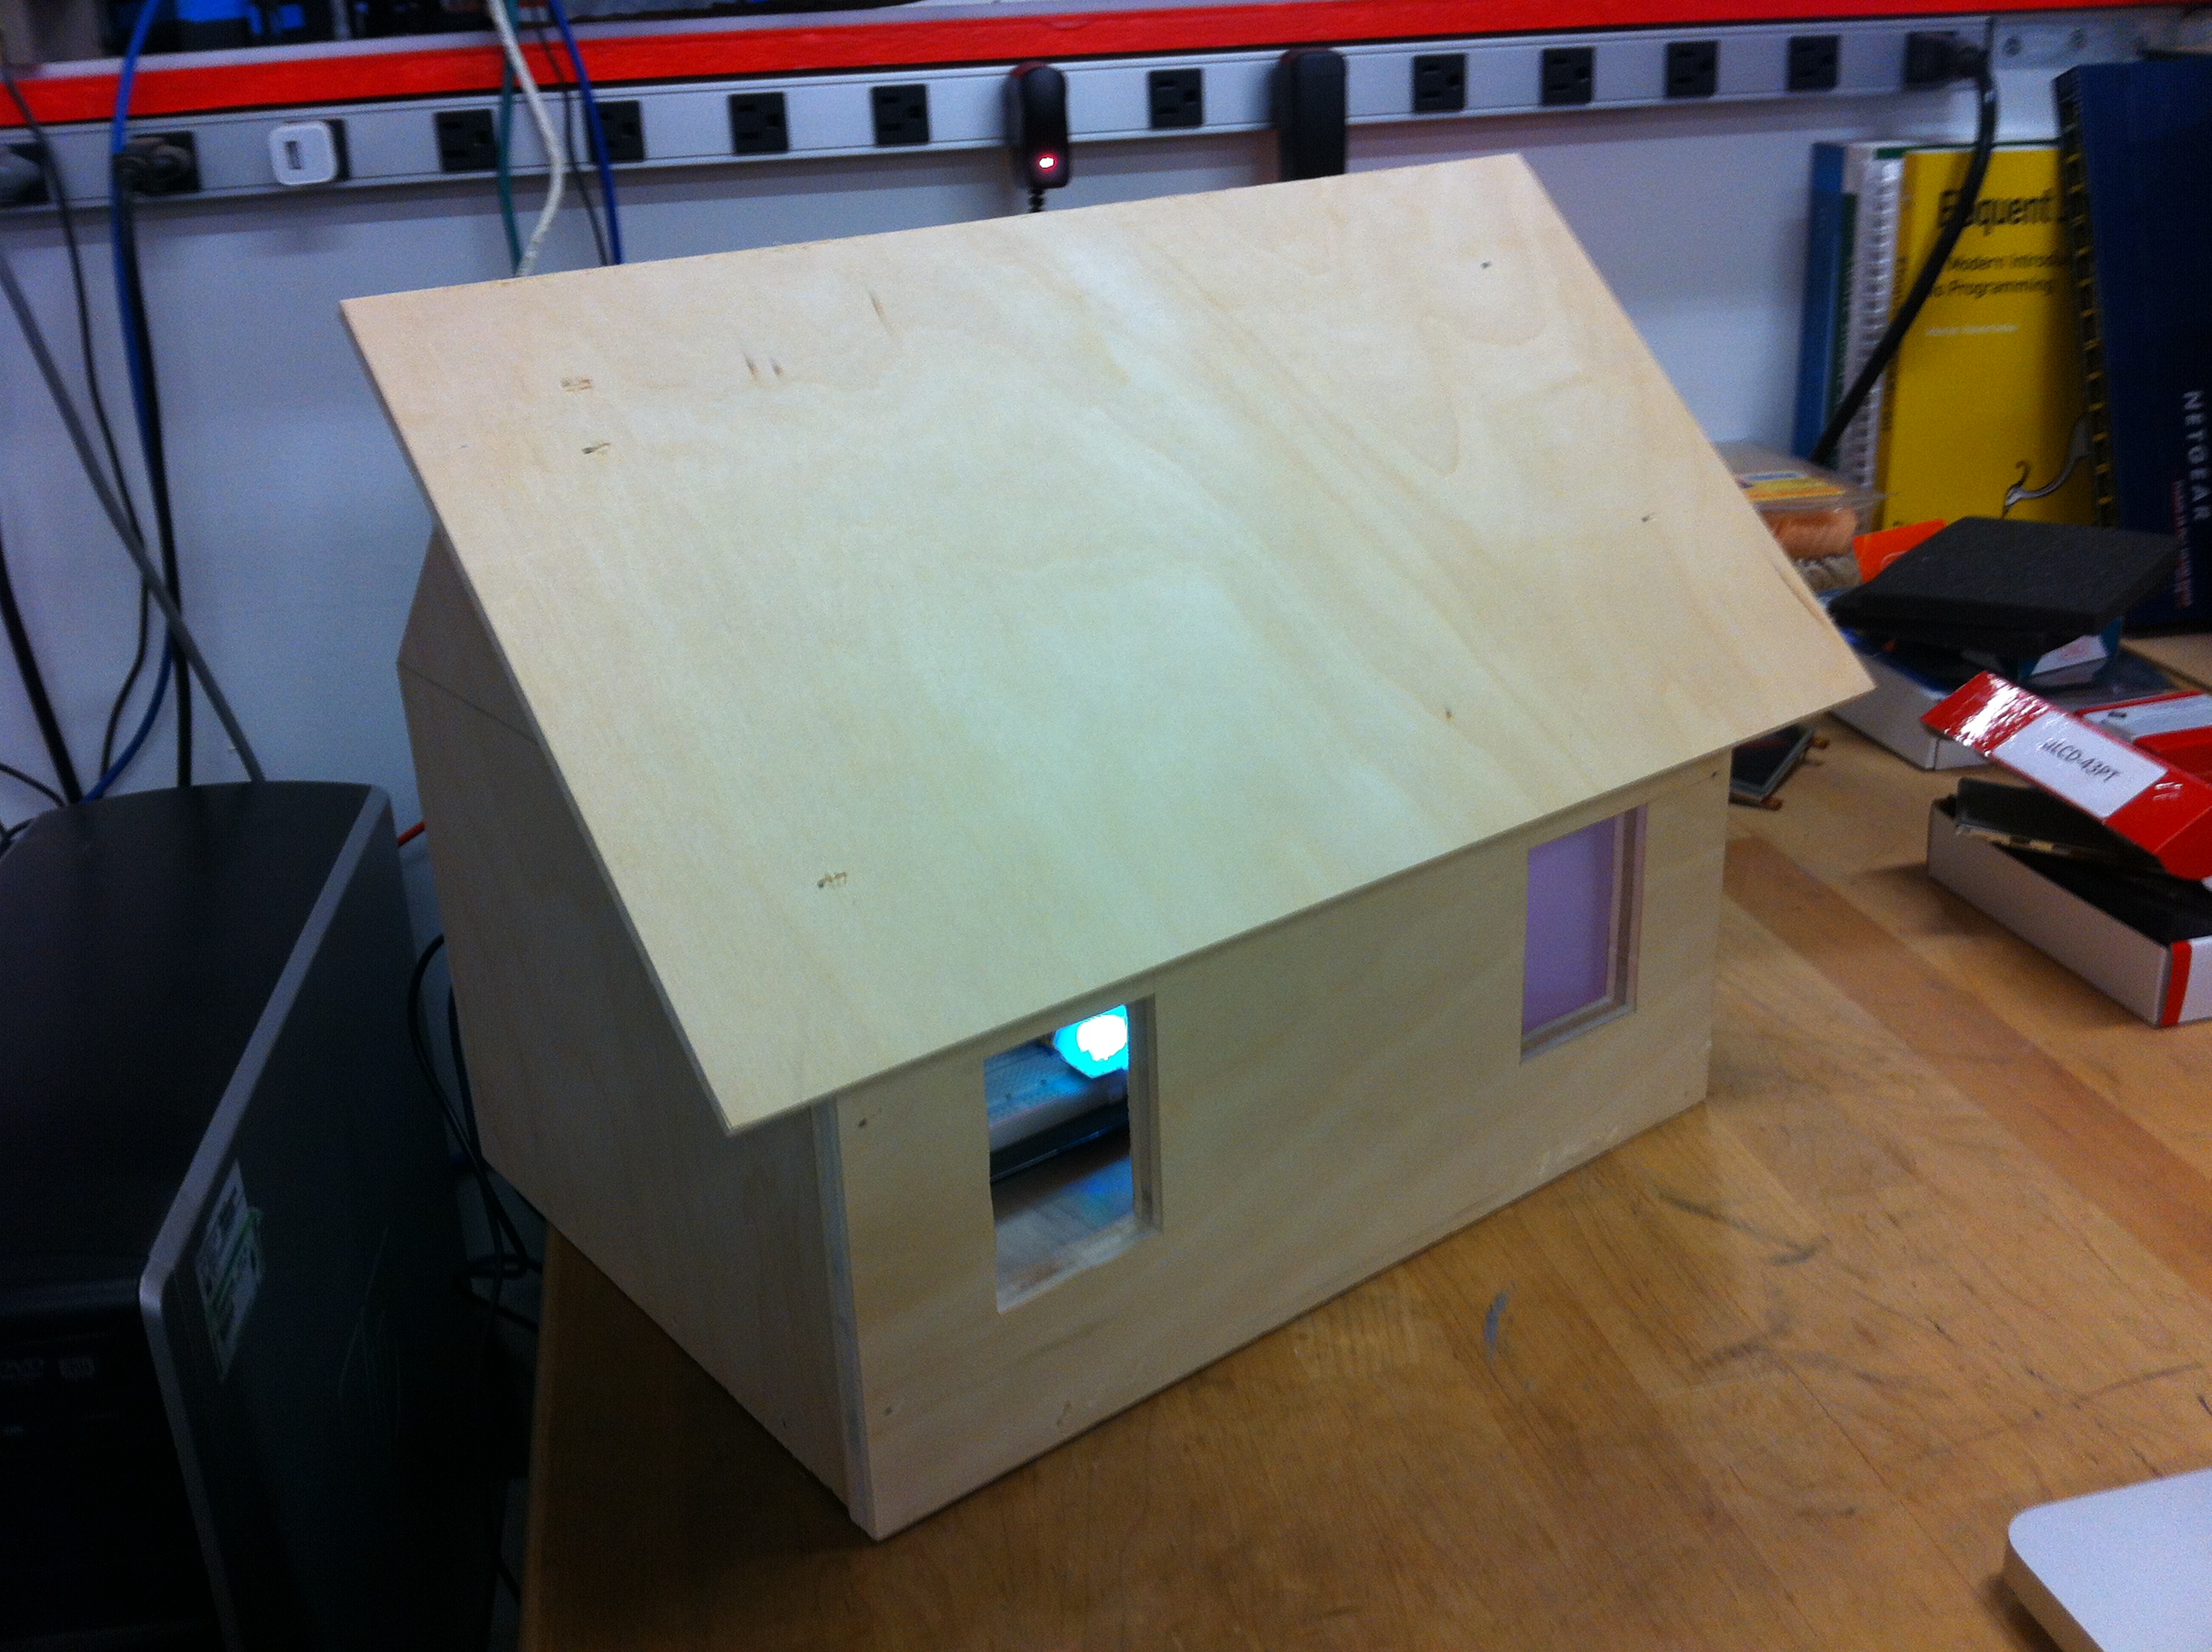
Front view of the sketchiest storyhouse prototype
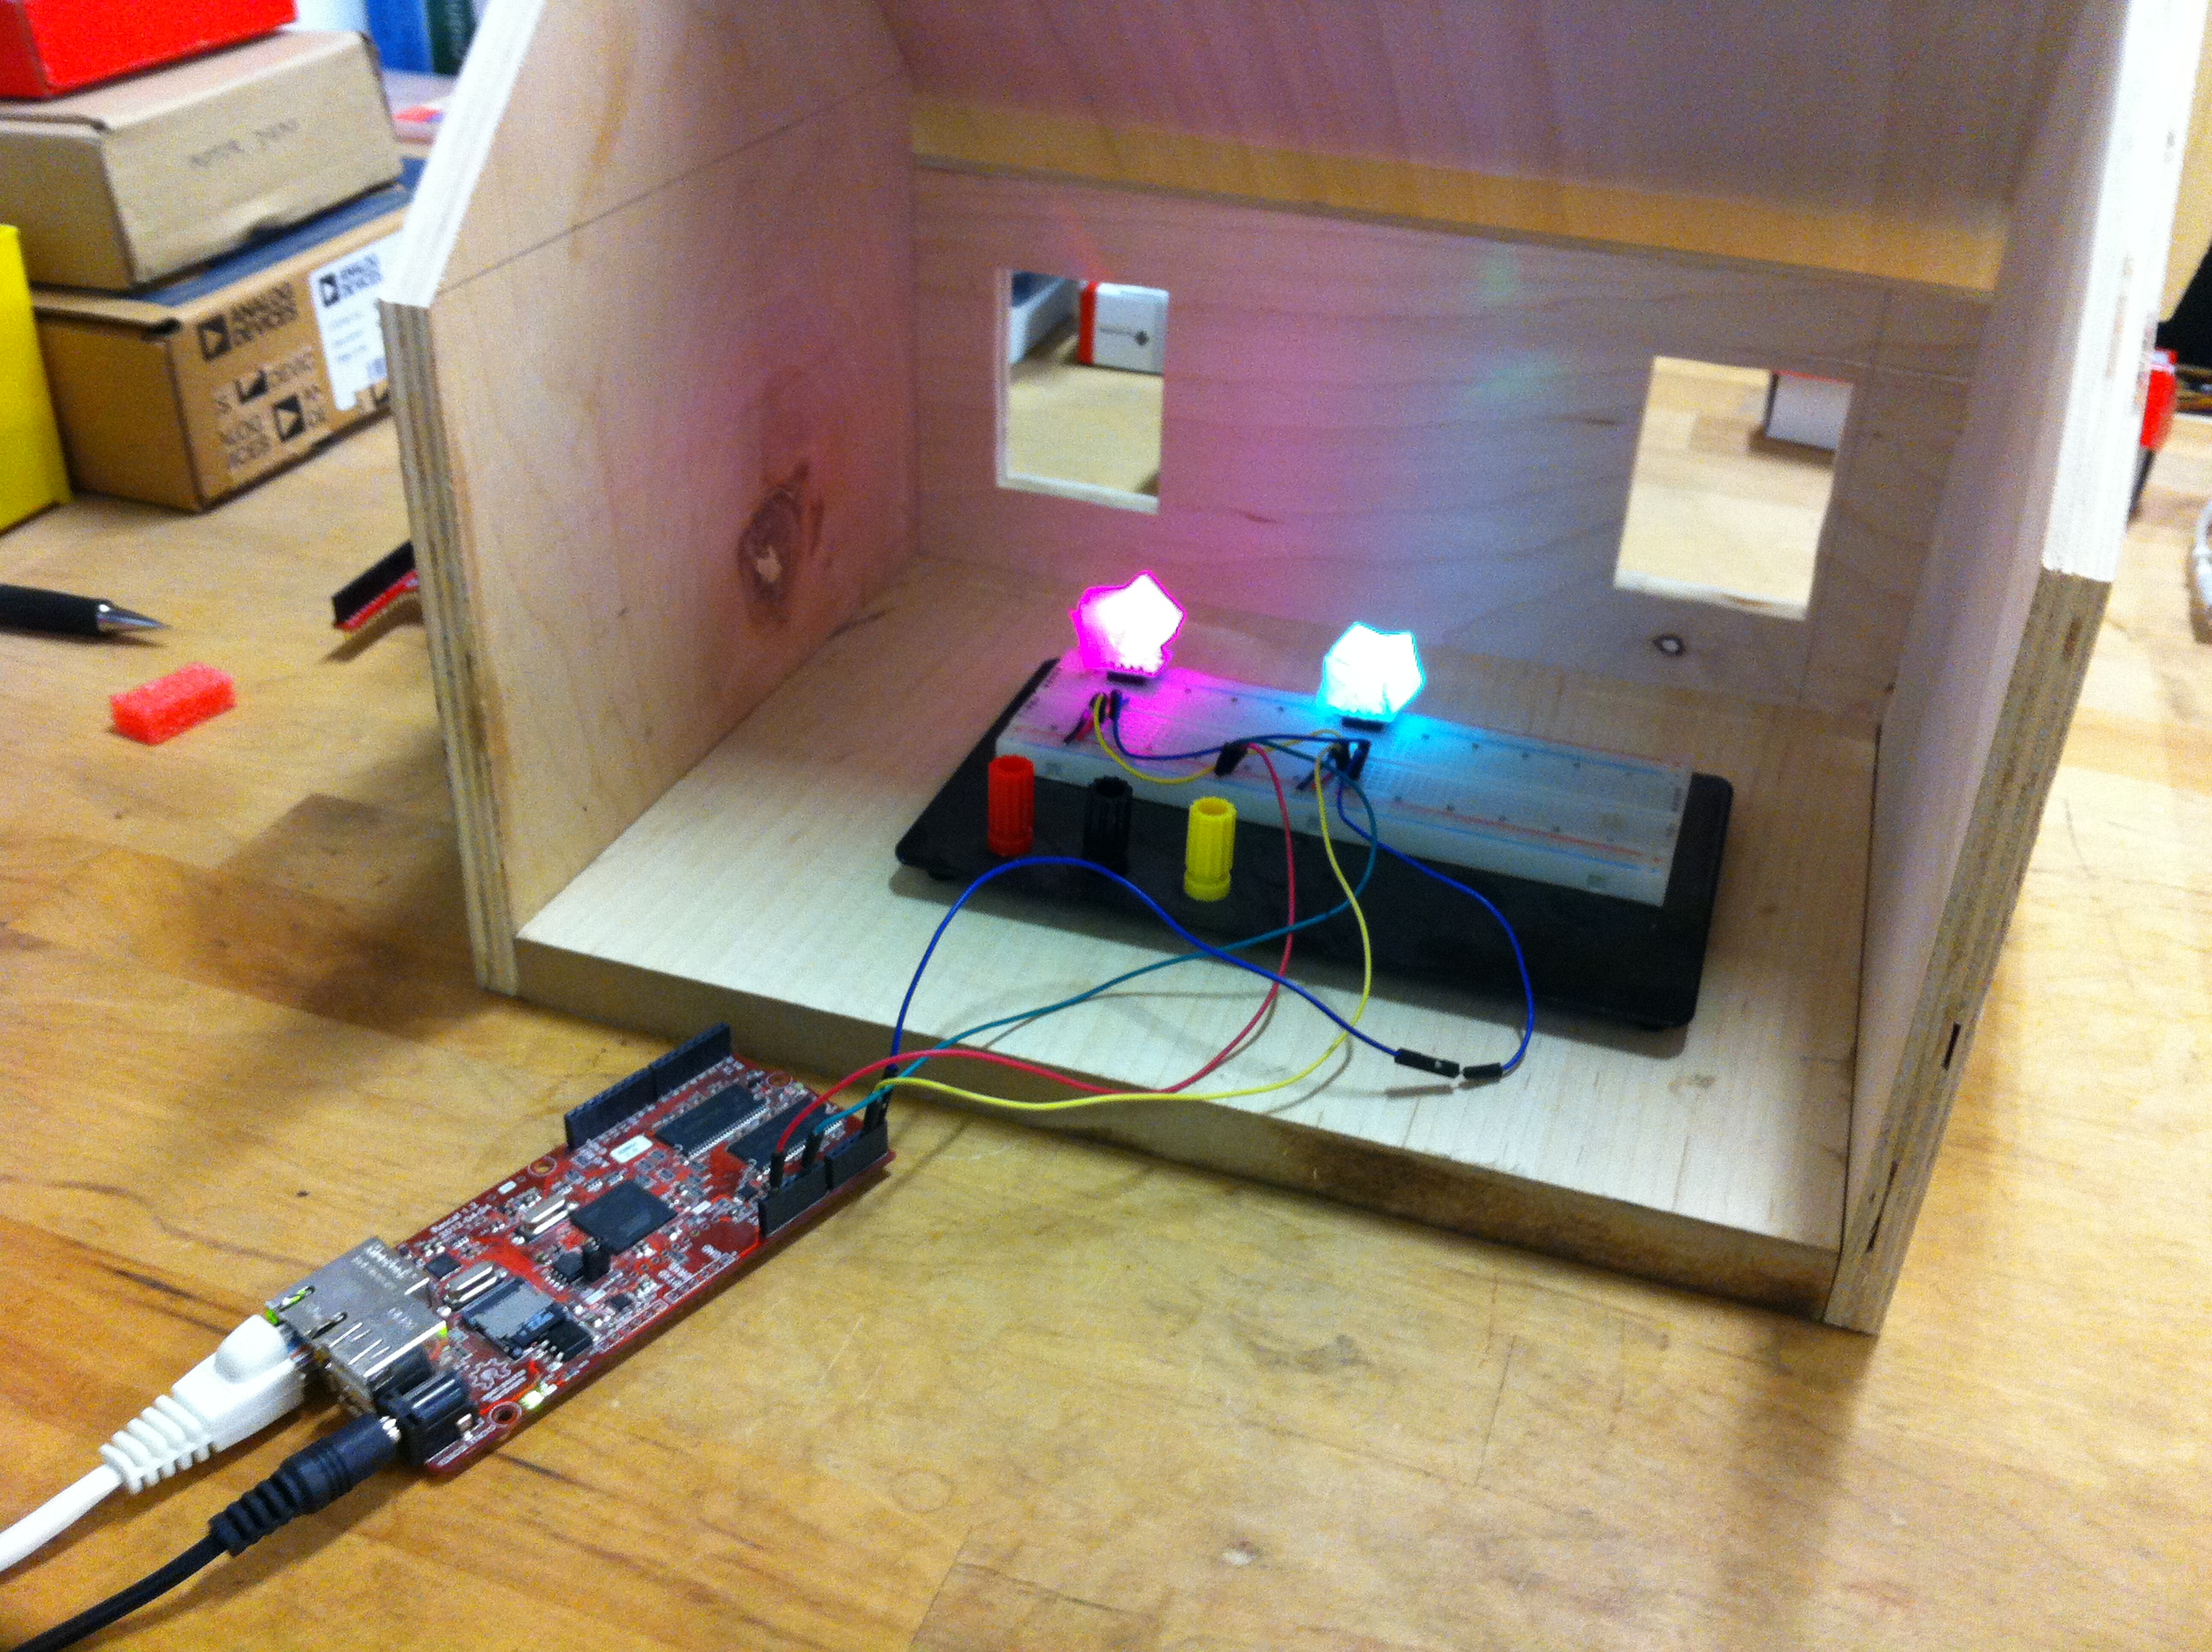
Back view of the storyhouse prototype
What kind of imagining do you want?
To my mind, the kind of unconstrained, imaginative storytelling that works with a storyhouse is totally different than what happens when you play with modern, hyper-realistic toys. Consider the modern "digital dollhouse", a virtual dollhouse app for smartphones that appeared on the New York Times list of "apps to keep children happy". When you look at a virtual dollhouse, you see cartoon illustrations of families going about their business in their homes. You can imagine the characters' personalities and behavior, but the visual elements of the interaction are predetermined by whoever drew the cartoons. You can change the characters' clothes, but all the choices are conventional, like a T-shirt or dress. You can't choose, for example, to dress a character in a sea of bees, a hurricane, or electricity.
If your goal for imaginative play is to keep children happy, or at least shut them up while you drive somewhere, like the New York Times suggests, maybe this kind of imagination-inside-a-prison scenario is what you're after, but it's not what the storyhouse is for. The point of the storyhouse is to be a stage for stories, something that helps get your imagination going. Once it's going, you can take the story wherever you want.
Plans for the future
I'm thinking about how I could bring the first group of storyhouses into existence. There's a Cambridge custom woodworker in the same makerspace as Rascal headquarters who is interested in making some storyhouse prototypes that we would jointly sell as kits. We may have a demo working for the Cambridge Science Festival on April 20, 2013, or on display during the public Battlebots Challenge at Artisan's Asylum on April 21, 2013. If you're interested, drop me an email at brandon at rascalmicro dot com
January 18, 2013
Interactive public art on Boston's Greenway
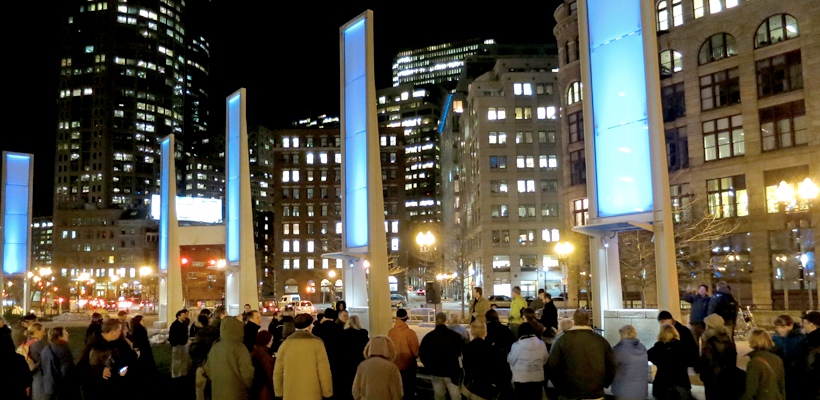
The opening event at the light blades. I'm the guy on the stage in the hat.
The Rose Kennedy Greenway is a 15 acre park that was created in 2008 when route 93, the main highway through Boston, was put underground. In the middle of the Greenway, there is a fountain flanked by 12 steel light sculptures, called the light blades.
Over the last year, I've been working with a public artist here in Somerville, Dan Sternof Beyer, to use the Rascal to make the light blades controllable from anyone's cell phone via text message.
Last Thursday night, the Greenway Conservancy held an event to unveil the phone number (917-525-2337). Between now and sometime in mid-March 2013, you can text the name of a color to that number, and the blades will obey your command. Dan put together the video below, which shows a few clips from the opening and the blades in action.
Technical overview
At the heart of the project is a Rascal, installed in a subterranean vault under the street near the light blades. The Rascal is listening for text messages forwarded across the internet by Twilio, a cloud communication service. The diagram below shows the full technology stack.

The code
The Rascal hosts its own code editor and web framework, based around CodeMirror and Flask. The crux of the code is below. (The list of colors is shortened here because it's boring. The full Color Commons code is up on Github.)
When a message arrives, the Rascal looks it up in a dictionary of colors. (The first ~200 colors or so came from the Python webcolors library, but we added more since then, along with some easter eggs.) If the color can't be found in the dictionary, the Rascal picks a show to run at random. Once a show is selected, the Rascal uses the RS-232 shield plugged into it to talk to the Color Kinetics iPlayer, which talks to the light fixtures using DMX.
python
@public.route('/sms', methods=['POST'])
def control_lights():
    d = {'airforceblue': '11',
        'airsuperiorityblue': '11',
        'aliceblue': '16',
        'amaranth': '29'
    } # dictionary of colors severely truncated
    message = request.form['Body']
    # print writes to the webserver log
    print "Received text message: " + str(message)
    try:
        # normalize and look up the message
        program = int(d[message[0:25].lower().replace(' ', '')])
    except KeyError:
        # pick a random show if we don't understand the message
        print 'color {0} not found'.format(message)
        program = random.randint(10,98)
    # translate the message to a hex show command
    command = 'X04%(number)2.2X' % {"number": program}
    print 'Translated {0} to {1}'.format(message, command)
    # validate the command, just to be double-sure
    if (command in allowed_commands):
        # tell the iPlayer to start the show
        pytronics.serialWrite(command, speed=9600)
    else:
        print "Command {0} is not one of the allowed commands.".format(command)
        command = 'FAIL'
    return('<?xml version="1.0" encoding="UTF-8"?><Response>{0}</Response>'.format(command))
A persistent encrypted connection for public art
The hardest part of getting the light blades to respond to text messages was figuring out the network connection. We initially hoped that the Boston Fiber Network would allow us to forward incoming requests from Twilio across their network, but they were worried about the security implications and refused. They suggested that we use a proprietary VPN connection on the Greenway's public wifi network to a Greenway office instead. We got that working on an old Linux server, but the connection was not reliable. In the end, we used a reverse SSH tunnel to an external Linux server, using AutoSSH to make it reliable. The result was that even though the wifi drops out from time to time, the connection has survived for the last month and approximately 3000 text messages so far.
Some more technical details about the Rascal and AutoSSH are on the light blades project page.
Open invitation
If you are interested in making interactive public art like the light blades, please email brandon@rascalmicro.com. We would love to make cell phones into your city's remote control. We're always short on time and money, but we're happy to talk stuff over and point you in the right direction.
January 15, 2013
The first Rascal hackathon at Tufts University
In late December, we held the first Rascal "Hack Afternoon" at Tufts University in Medford, MA, USA, just over the town line from Rascal headquarters in Somerville. The Tufts Center for Engineering Education and Outreach (CEEO) had recently bought several Rascals, and they wanted to get off to a quick start on some projects. (Tufts is now tied with Harvard University for the largest installed base of Rascals.)
The CEEO is an unusual entity in that it draws faculty and students from engineering and education in roughly equal proportions. They work to integrate engineering into education for kids in the K-12 range. In practice, this means that they have a lab filled with a lot of Legos and other stuff that straddles the line between toys and engineering prototyping tools. They develop curricula and hold workshops for teachers and kids to test out new methods of engineering education, and they're constantly looking for tools like the Rascal that will help them prototype more efficiently.
The ten people who showed up for the hackathon, organized by professors Chris Rogers and Ethan Danahy, were mostly professors and graduate students in computer science and mechanical engineering, but we did have a few education folks participate. The Rascal really shines at prototyping web-based systems; this is what attracted the CEEO to the Rascal. In the first fifteen minutes of the hackathon, Ethan had built a web page with buttons that could flash the Rascal's onboard LED. An hour or so later, Chris and Ben Shapiro had hacked up a LabVIEW front-end that talked to the Rascal over TCP/IP using the Rascal's REST API.
I also got a pile of good feedback on the Rascal's rough corners-- areas where the documentation should be improved, parts of the editor where the interaction could be smoothed, and new ideas for additional features. Some of those improvements are already added to the codebase for the next software release ("Cooties"). There's also a longer-term project that I'll be working on to make it easier to find your Rascal on the network.
Thanks to Chris, Ethan, Ben, Saad, Rafi, Steve, Brian, Jessica, and the folks whose names I missed for showing up.
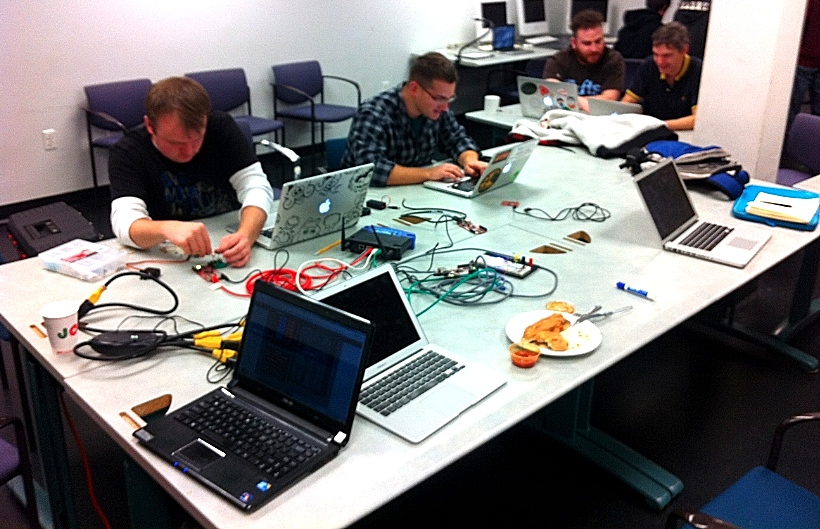
Brian, Rafi, Ben, and Chris hack on Rascals
older postsnewer posts